
如何在 Elementor 中實作逐行淡入文字動畫:分步指南
文字動畫可增強網站的互動性,讓使用者體驗更吸引人。本指南說明如何逐步建立、 逐行淡入文字動畫 使用 元素 為您的網站帶來動態且具視覺吸引力的效果。
為何使用淡入動畫?
淡入動畫讓您的內容更有生命力,並有助於將注意力引向關鍵元素。逐行顯示文字可避免過多資訊壓迫使用者,並創造更有條理的閱讀體驗。
建立逐行淡入動畫的步驟
安裝並啟動 Elementor
使用前 Elementor 的 功能,確保已安裝並啟用外掛程式:
- 登入您的 WordPress 面板。
- 導覽到 外掛程式 > 新增 外掛程式.
- 搜尋 元素 然後按一下 立即安裝.
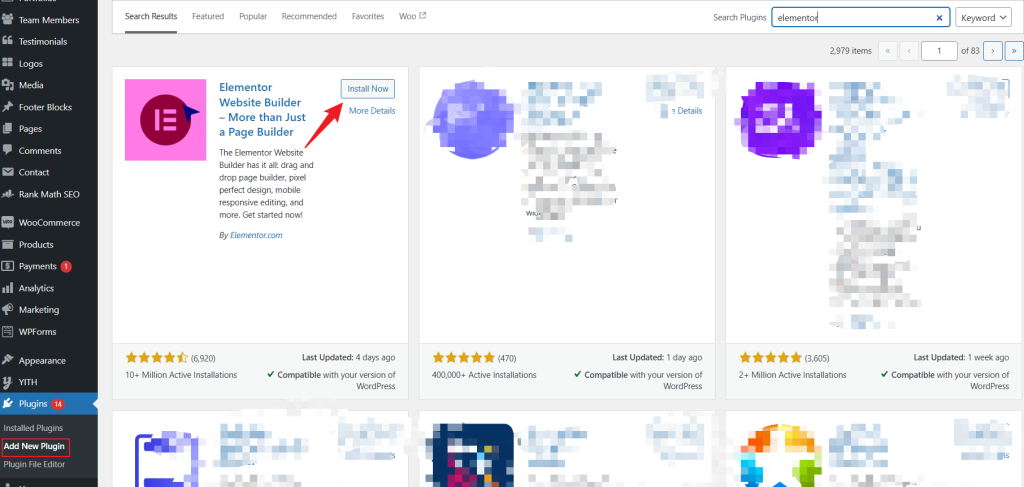
- 安裝完成後,按一下 啟動.
Elementor Pro 釋放更多進階的動畫功能,稍後將會探討。
新增文字 Widget
- 開啟 或 建立 在 WordPress 中新建頁面/帖子,並使用 Elementor 編輯。
- 從 Widget 面板拖曳 文字編輯器 widget 到您頁面上所需的位置。
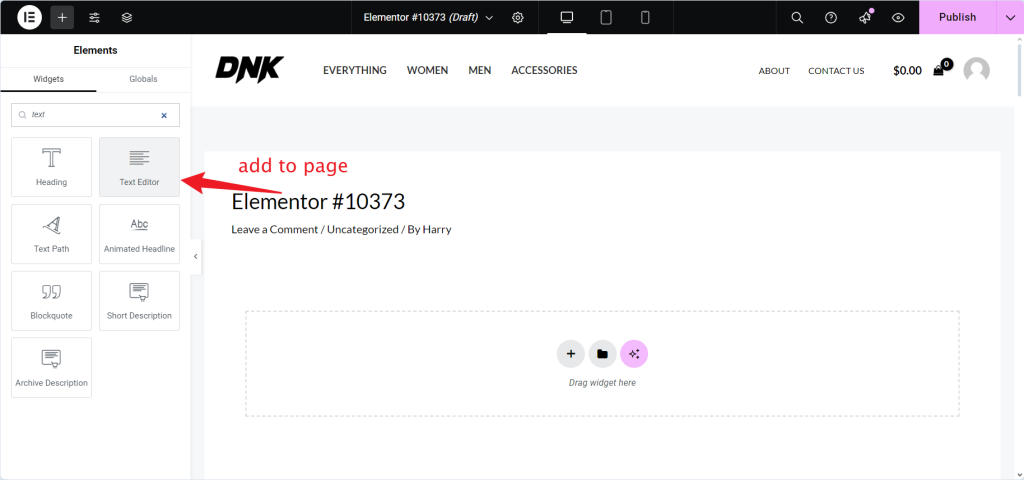
這個 widget 是淡入效果的基礎。
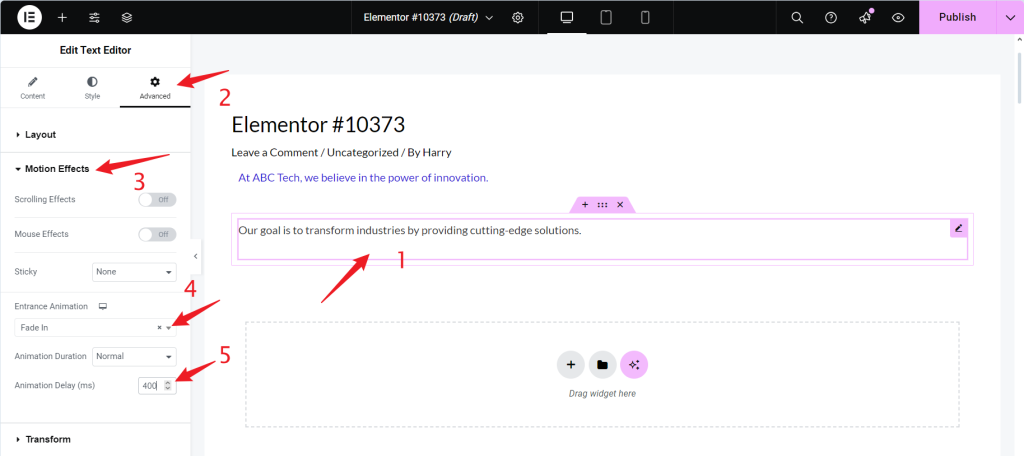
套用 Elementor 內建動畫
- 選取文字 Widget。
- 在 左手 面板,按一下 進階 標籤。
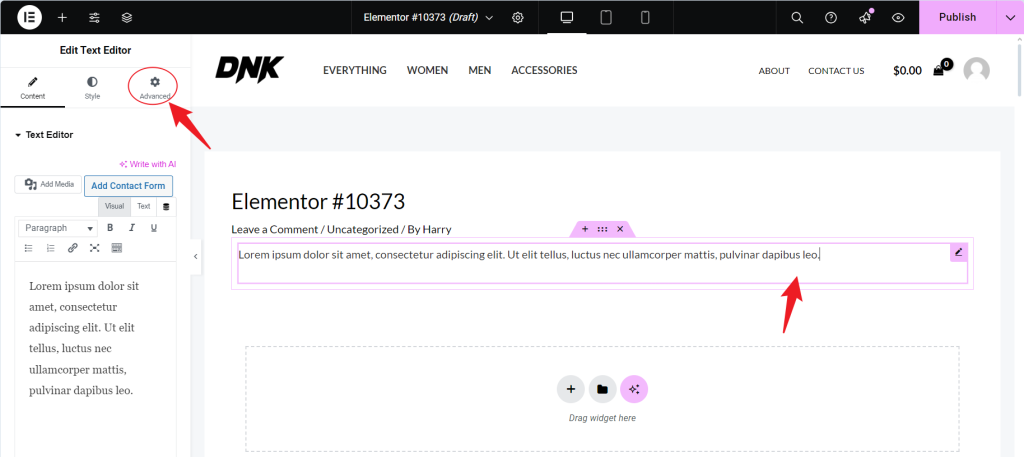
- 請向下捲動至 動態效果 部分,並展開它。
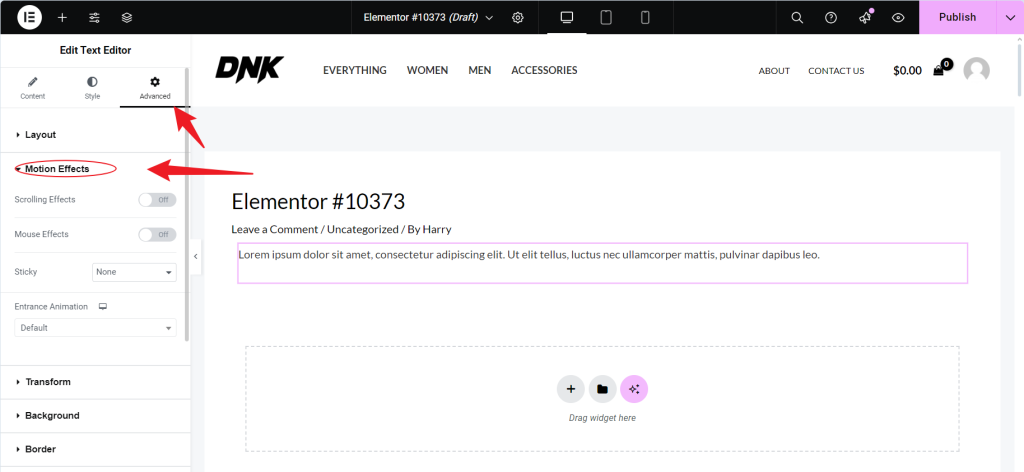
- 在 入口動畫 下拉選項,選擇 淡入.
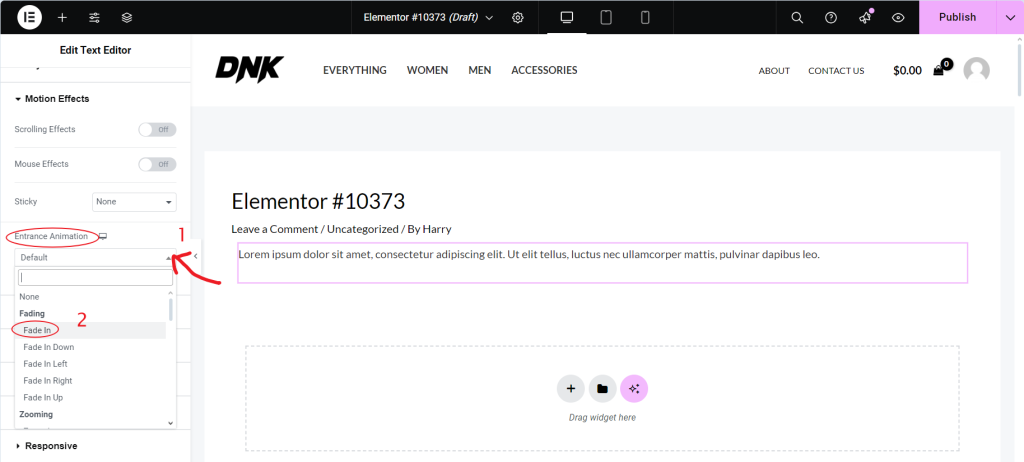
這會套用基本的淡入動畫。以下步驟可建立逐行效果。
執行逐行淡入效果
要實現逐行淡入、 分手 全文 分為多個區段,並為每個區段單獨製作動畫。
- 將文字分成多行:將內容分割成獨立的行或句子,並將每個行或句子放置在其文字 Widget 中。
- 設定個別動畫:對每個文字 Widget 重複上述步驟,以套用 淡入 動畫,確保一致性。
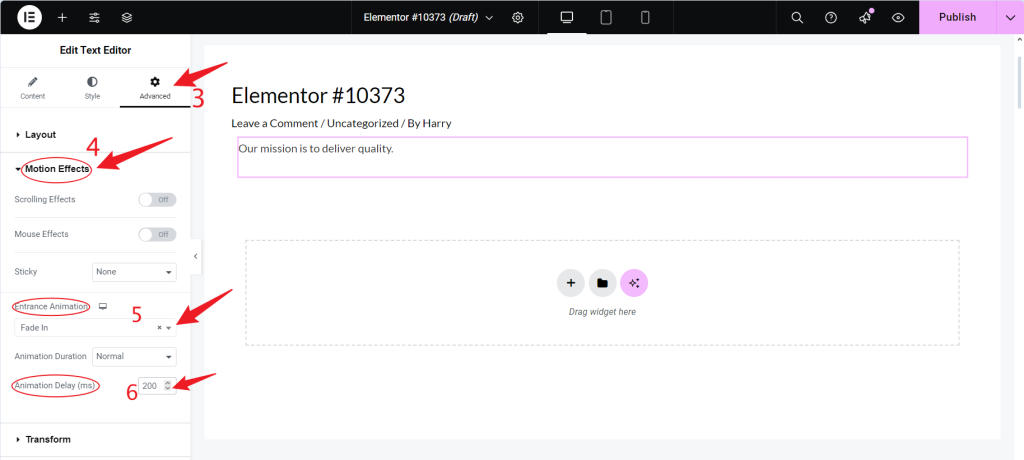
- 新增動畫延遲:為每個文字 widget 設定不同的延遲時間。例如
- 線路 1:0.2 秒延遲
- 線 2:0.4 秒延遲
- 線 3:0.6 秒延遲
交錯延遲可產生平順、連續的淡入效果。
範例文字:
比方說,您希望以下文字逐行顯示:
"我們的使命是提供品質。我們以客戶滿意度為優先。我們一起為未來創新"。
逐步分解:
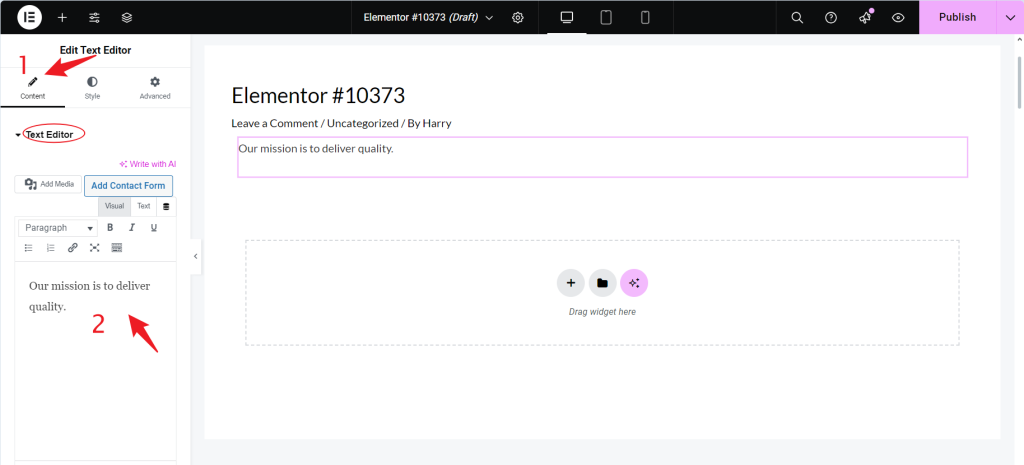
- 第 1 線:
- 文字:「我們的使命是提供品質」。
- 新增一個 文字編輯器 小工具。
- 輸入這個句子作為文字。
- 應用 淡入 動畫,並將延遲設定為 0.2 秒.
- 線 2:
- 文字:「我們以客戶滿意度為優先」。
- 加入另一個 文字編輯器 小工具。
- 輸入這個句子作為文字。
- 應用 淡入 動畫,並將延遲設定為 0.4 秒.
- 三號線:
- 文字:「攜手創新,共創未來」。
- 加入另一個 文字編輯器 小工具。
- 輸入這個句子作為文字。
- 應用 淡入 動畫,並將延遲設定為 0.6 秒.
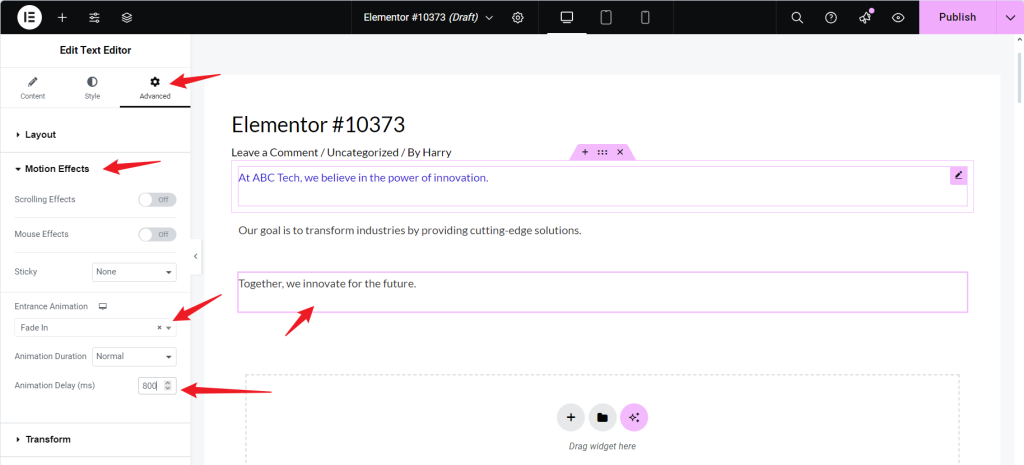
當使用者捲動或觸發動畫時,每個句子都會依序淡出,創造出平滑的轉換效果。
此方法可確保每行文字獨立出現,每行之間略有延遲,以提高可讀性,並營造動態的視覺效果。
使用 Elementor Pro 的進階淡入效果
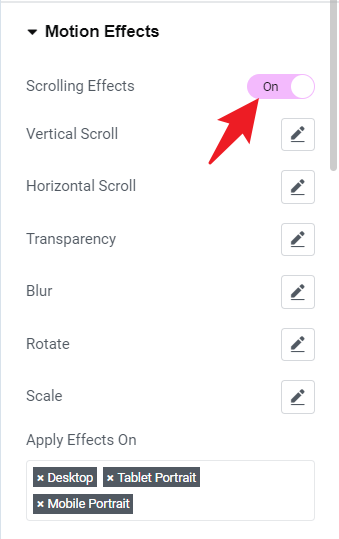
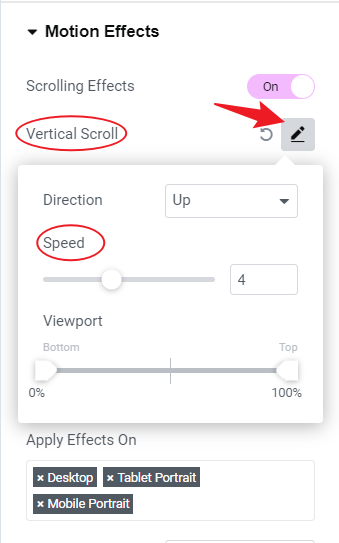
Elementor Pro 提供更多的控制功能,包括捲動觸發的效果,以提供動態體驗。
- 啟用捲動效果:在 動態效果 節,開啟 捲動效果 以在使用者捲動時觸發動畫。
- 增加透明度:在捲動設定中,選擇 淡入 在下 透明度 以便文字在捲動時逐漸出現。
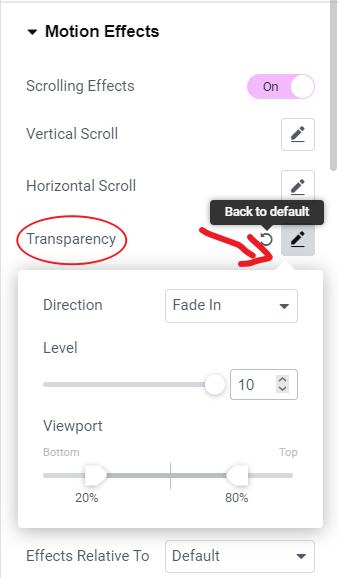
- 調整速度和方向:微調速度和方向以配合捲動行為,增強互動性。
預覽與發佈
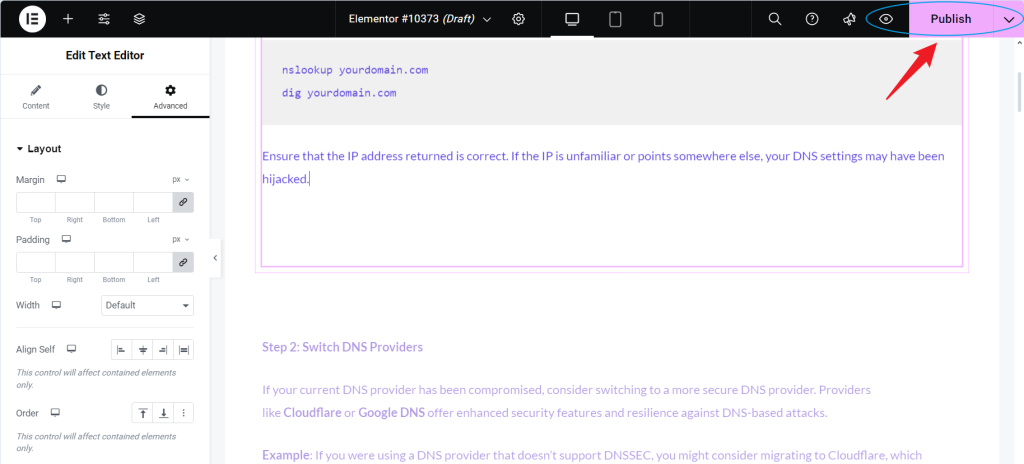
設定動畫後,預覽頁面以確保一切運作符合預期:
- 按一下 預覽 按鈕。
- 捲動頁面,確認每一行依序淡入。
- 如果效果正確,請按一下 發表 使頁面生效。
總結
總而言之,使用 Elementor 製作逐行淡入文字動畫,是以清晰且具視覺吸引力的方式呈現內容,提高使用者參與度的好方法。透過仔細安排動畫的時間和加入延遲,您可以確保使用者以舒適的速度吸收資訊,避免資訊超載。對於想要更多控制權的人,Elementor Pro 提供額外的功能,例如捲動觸發動畫和其他自訂選項。設定好一切後,預覽結果並發佈您的頁面,為您的訪客創造流暢的互動體驗。


回應