WordPress: Automated Testing & CI Guide

The era of relying solely on manual testing for software development, including WordPress, has ended. The transition from manual testing to automated testing is a response to the evolving needs of software development teams. This article offers a beginner-friendly yet detailed overview of why this shift has occurred, the benefits of automated testing and continuous integration (CI) for WordPress development, and how to implement these practices effectively.

1. The Shift from Manual to Automated Testing in WordPress
Manual testing is essential for understanding how an application works, but it has numerous limitations. It is time-consuming, requires significant resources, and is prone to human error, especially in repetitive scenarios.
Automated testing addresses these issues by providing a fast, efficient, and consistent way to test WordPress applications. Whether you are building a simple blog or a complex membership website, automated tests save time, reduce errors, and help ensure your website functions as intended.

1.1 Why Transition to Automated Testing?
- Maximize Efficiency: Automated tests can execute numerous test cases quickly, reducing the time and effort required compared to manual testing.
- Scalability: As your website or application becomes more complex, automated testing can handle more scenarios without increasing the workload for your development team.
- Ease of Integration: Automated testing integrates seamlessly into the development pipeline, enabling quick detection and resolution of errors. This is crucial in Agile and DevOps environments, where updates are frequent.
- Repeatable and Reliable: Automated tests can be repeated across multiple environments, ensuring that all features continue to work as expected, which is particularly important for WordPress sites with various plugins and customizations.

2.Benefits of Automated Testing and CI/CD in WordPress Development
Automated Testing and Continuous Integration/Continuous Deployment (CI/CD) are vital for maintaining high-quality WordPress websites.
- Automated Testing allows developers to catch errors early, reducing the chance of bugs being deployed to production.
- Continuous Integration ensures that code changes different developers make are regularly merged into a shared repository, reducing conflicts and integration issues.
- Continuous Deployment automates the Deployment of updates, ensuring that the latest features are made live seamlessly without disrupting existing functionality.

3. Key Tools for Automated Testing in WordPress
Several tools can be employed to streamline automated testing in WordPress. These tools ensure code quality, check plugin compatibility, and help identify issues early in the development cycle.
3.1 PHPUnit
PHPUnit is the official testing framework the WordPress core development team endorsed for testing PHP code. It is a robust tool that ensures the stability of plugins and themes.
Step-by-Step Setup for PHPUnit:
1.Install PHPUnit:
Install PHPUnit via Composer. Run the following command to install:
composer require --dev phpunit/phpunitReason: Using Composer ensures that you have the correct version of PHPUnit compatible with your WordPress environment.
2.Clone the WordPress Test Repository:
Clone the WordPress test repository to create an isolated test environment. Use Git or SVN to clone:
git clone https://github.com/WordPress/wordpress-develop.gitReason: This provides you with the necessary files and environment to test your WordPress code without affecting your production setup.

3.Configure Your Testing Environment:
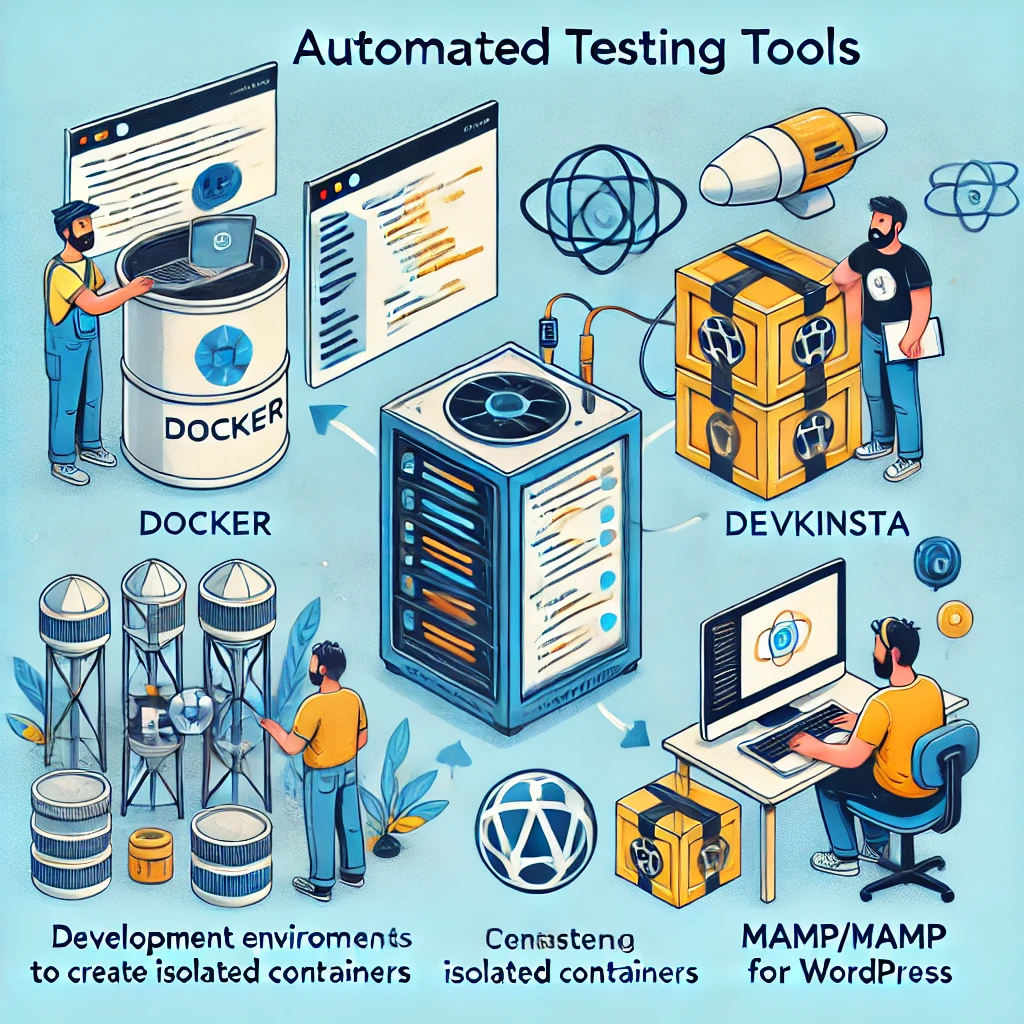
- Set up a local testing environment using a local server like MAMP, WAMP, or Docker. This step ensures that the test environment matches your production environment as closely as possible.
- Tip: Docker is particularly useful for creating isolated containers that prevent conflicts with your main development setup.
4.Run PHPUnit Tests:
Execute the tests with the following command:
./vendor/bin/phpunitReason: Running tests helps identify bugs early in the development process, improving code quality and reducing deployment issues.
PHPUnit is ideal for testing the backend functionality of your plugins and themes, providing detailed feedback to developers.
3.2 WP-CLI
WP-CLI is the command-line interface for WordPress, simplifying the setup and management of PHPUnit tests.
Using WP-CLI to Set Up Tests:
1.Install WP-CLI:
- Download WP-CLI using the command line:
curl -O https://raw.githubusercontent.com/wp-cli/builds/gh-pages/phar/wp-cli.phar
chmod +x wp-cli.phar
mv wp-cli.phar /usr/local/bin/wpReason: WP-CLI provides a faster way to manage WordPress installations, especially useful for repetitive tasks like setting up test environments.
2.Generate Plugin Test Files:
Use WP-CLI to create unit test files for your plugin:
wp scaffold plugin-tests my-pluginReason: The wp scaffold plugin-tests command creates all necessary files to start testing, saving you time.
3.Set Up the Test Database:
Create a separate test database to run unit tests without affecting your production data:
bash bin/install-wp-tests.sh wordpress_test root '' localhostTip: Always use a dedicated test database to prevent accidental modifications to your live site data.
4.Run Tests:
- Write unit tests and run them using PHPUnit. WP-CLI helps automate the scaffolding process, making it simpler to get started with testing.

3.3 Cypress for End-to-End Testing
Cypress is an open-source framework for creating end-to-end tests for WordPress websites. It is especially useful for testing how a website interacts with users.
How to Set Up Cypress:
1.Install Cypress:
Install Cypress via npm:
npm install cypress --save-devReason: Cypress is designed for end-to-end testing, which means it tests your website’s entire workflow, providing insights into user interactions.
2.Configure Cypress:
Cypress automatically creates necessary files and folders, such as cypress.json, to set up the framework. You can configure this file to fit your project needs.
Tip: Customize the baseUrl in cypress.json to match your testing environment.
3.Write Tests:
Cypress uses JavaScript to write test scripts. For example, to test a login page:
describe('Login Test', () => {
  it('should log in successfully', () => {
    cy.visit('https://example.com/login');
    cy.get('input[name="username"]').type('user');
    cy.get('input[name="password"]').type('password');
    cy.get('button[type="submit"]').click();
    cy.contains('Dashboard').should('be.visible');
  });
});Reason: Cypress provides a clear syntax that makes writing and understanding test cases easy, even for beginners.
4.Run Tests:
Run Cypress tests using:
npx cypress openTip: The Cypress UI visually represents each test step, making debugging easier.
Cypress provides a highly visual, interactive way to test user interactions, which makes it particularly effective for front-end testing.

3.4 Behat for Behavior-Driven Development (BDD)
Behat is a framework focusing on behavior-driven development (BDD), which is ideal for testing user experiences in WordPress.
Setting Up Behat:
1.Install Behat:
Install Behat using Composer:
composer require --dev behat/behatReason: Behat allows you to test the behavior of your WordPress application in natural language, ensuring that the functionality meets business requirements.
2.Configure Behat:
Create a behat.yml configuration file:
default:
  suites:
    default:
      contexts:
        - FeatureContext
  extensions:
    Behat\MinkExtension:
      base_url: http://localhost
selenium2: ~Tip: Use MinkExtension for browser automation, making it easier to simulate user interactions.
3.Write Scenarios in Gherkin:
Behat uses Gherkin, a language that describes user behavior. For example:
Feature: User Login
  Scenario: Successful Login
    Given I am on "/login"
    When I fill in "username" with "user"
    And I fill in "password" with "password"
    And I press "Login"
Then I should see "Welcome to your dashboard"Reason: Writing in Gherkin allows non-technical stakeholders to understand what is being tested.
4.Run Tests:
Run Behat using:
vendor/bin/behatTip: Running tests frequently helps identify discrepancies between expected and actual behaviors.
Behat is ideal for ensuring your WordPress website meets business requirements by focusing on end-user scenarios.
3.5 Codeception for Comprehensive Testing
Codeception allows developers to conduct unit, functional, and acceptance tests all in one tool, providing comprehensive testing for WordPress projects.
How to Set Up Codeception:
1.Install Codeception:
Use Composer to install Codeception:
composer require codeception/codeception --devReason: Codeception supports different tests, making it versatile for comprehensive WordPress testing.
2.Initialize Codeception:
Run the initialization command to set up Codeception:
vendor/bin/codecept bootstrapTip: Initializing Codeception creates the required folder structure for different test suites.
3.Configure Test Suites:
- Customize the codeception.yml file and set up specific suites like acceptance or unit testing.
- Reason: Each suite serves a distinct purpose, enabling targeted testing.
4.Write Tests:
Codeception supports PHP-based test scripts to test different scenarios, like:
<?php
$I = new AcceptanceTester($scenario);
$I->wantTo('ensure that login works');
$I->amOnPage('/login');
$I->fillField('username', 'user');
$I->fillField('password', 'password');
$I->click('Login');
$I->see('Dashboard');Tip: Using descriptive test names makes it easier to understand test intentions and results.
5.Run Tests:
- Use the command to execute the tests:
vendor/bin/codecept runCodeception combines different tests into a single workflow, validating complex WordPress projects robustly.
4. Integrating Testing Tools with Development Environments
Integrating automated testing tools with development environments helps streamline and enhance testing processes. Here’s how you can incorporate these tools into different environments:
- Docker: Use Docker to create isolated containers that mirror your production environment, ensuring that your tests are consistent across different environments.
- Tip: Docker allows you to run your tests in environments identical to production, minimizing “it works on my machine” issues.
- DevKinsta: DevKinsta provides a complete local WordPress development environment, making integrating tools like PHPUnit and Behat easy.
- Tip: Use DevKinsta to test locally and identify issues before deploying changes.
- MAMP/WAMP: MAMP and WAMP create local environments


Responses