
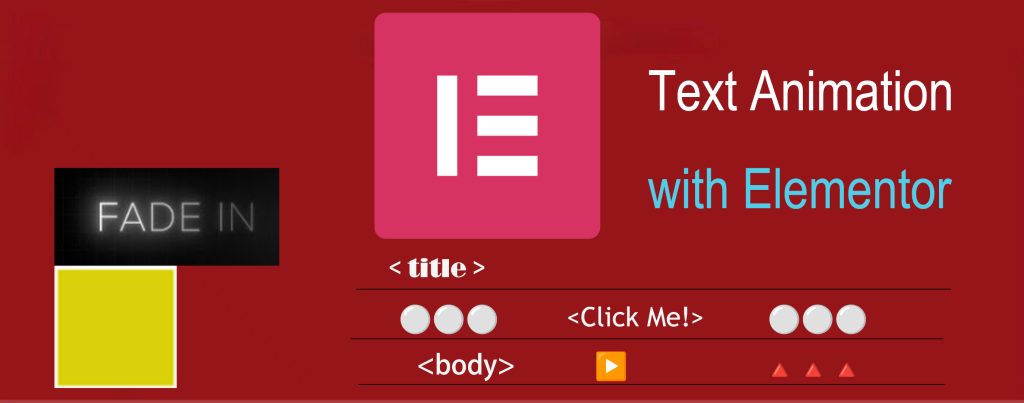
How to Implement Line-by-Line Fade-In Text Animations in Elementor: A Step-by-Step Guide
Text animations enhance a website’s interactivity, making the user experience more engaging. This guide explains how to create a step-by-step, line-by-line fade-in text animation using Elementor to bring dynamic and visually appealing effects to your website.
Why Use Fade-In Animations?
Fade-in animations make your content feel more alive and help direct attention to critical elements. Revealing text line by line avoids overwhelming users with too much information and creates a more structured reading experience.
Steps to Create Line-by-Line Fade-In Animation
Install and Activate Elementor
Before using Elementor’s features, ensure the plugin is installed and activated:
- Log in to your WordPress dashboard.
- Navigate to Plugins > Add New Plugin.
- Search for Elementor and click Install Now.
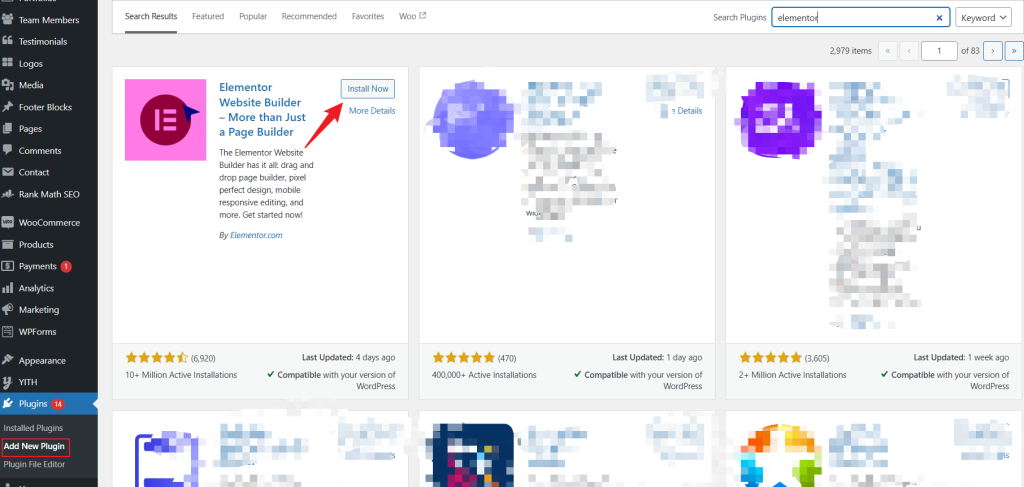
- Once installed, click Activate.
Elementor Pro unlocks more advanced animation features, which will be explored later.
Add a Text Widget
- Open or create a new page/post in WordPress and edit it with Elementor.
- From the widget panel, drag the Text Editor widget to the desired location on your page.
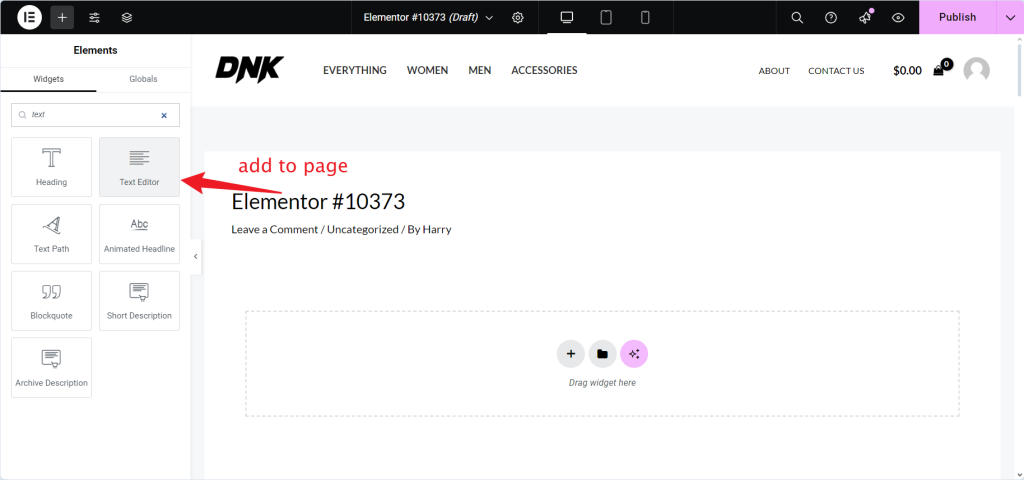
This widget serves as the base for the fade-in effect.
Apply Elementor’s Built-In Animation
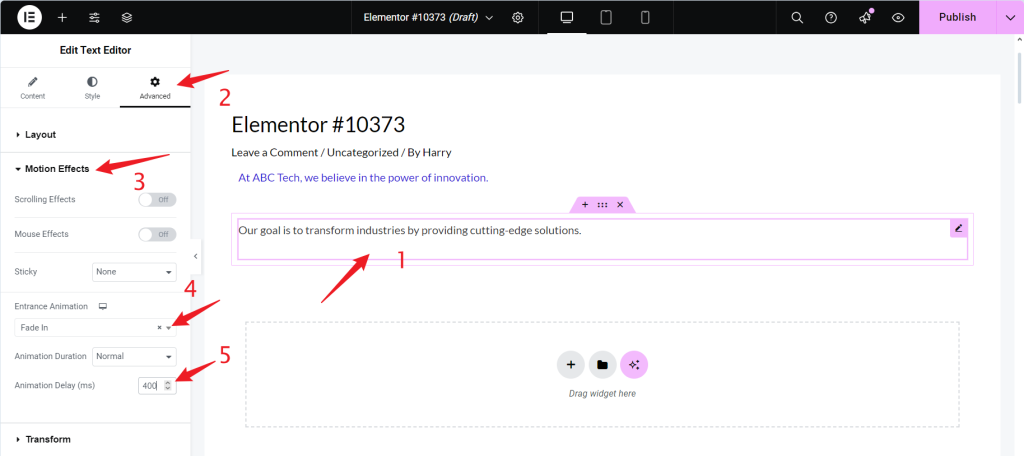
- Select the text widget.
- In the left-hand panel, click the Advanced tab.
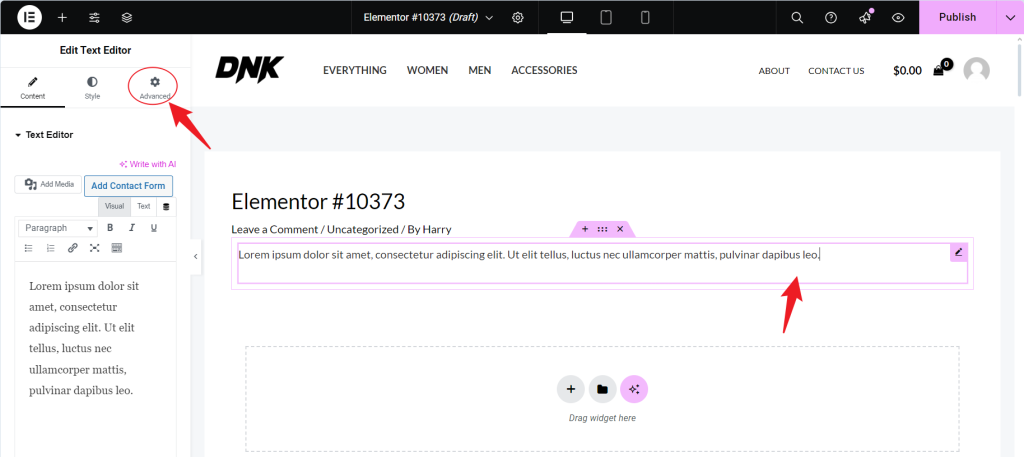
- Please scroll down to the Motion Effects section and expand it.
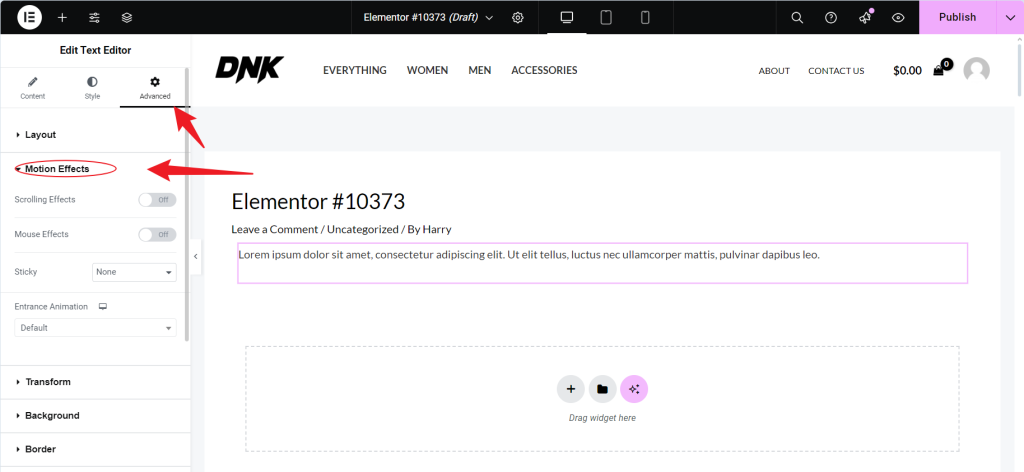
- In the Entrance Animation dropdown, select Fade In.
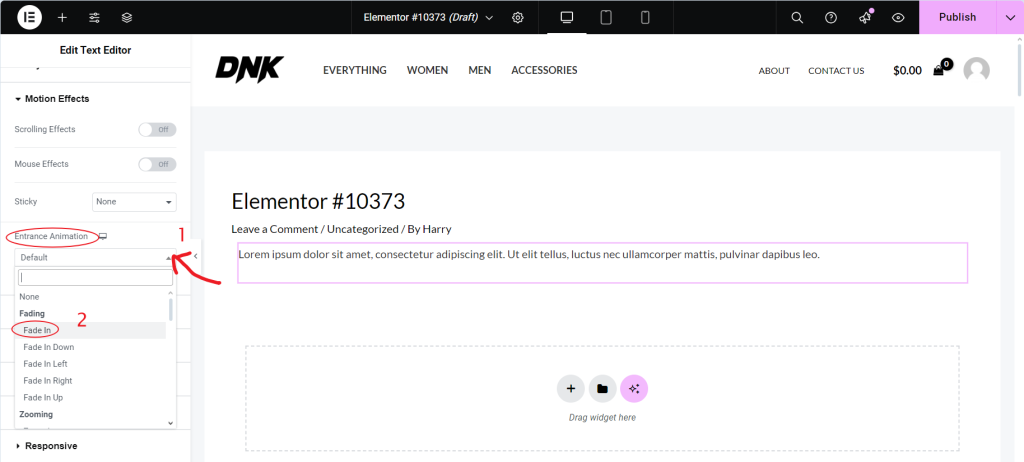
This applies a basic fade-in animation. The following steps create the line-by-line effect.
Implementing Line-by-Line Fade-In Effect
To achieve a line-by-line fade-in, break up the text into multiple segments and animate each individually.
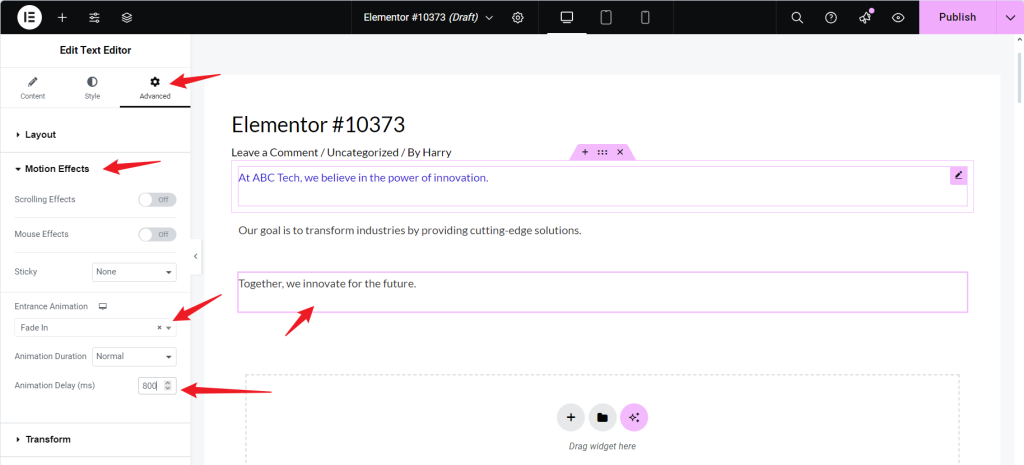
- Break the text into multiple lines: Divide the content into separate lines or sentences and place each in its text widget.
- Set individual animations: Repeat the above steps for each text widget to apply the Fade-in animation, ensuring consistency.
- Add animation delay: Set different delays for each text widget. For example:
- Line 1: 0.2-second delay
- Line 2: 0.4-second delay
- Line 3: 0.6-second delay
Staggering the delays creates a smooth, sequential fade-in effect.
Example Text:
Let’s say you want the following text to appear line by line:
“Our mission is to deliver quality. We prioritize customer satisfaction. Together, we innovate for the future.”
Step-by-Step Breakdown:
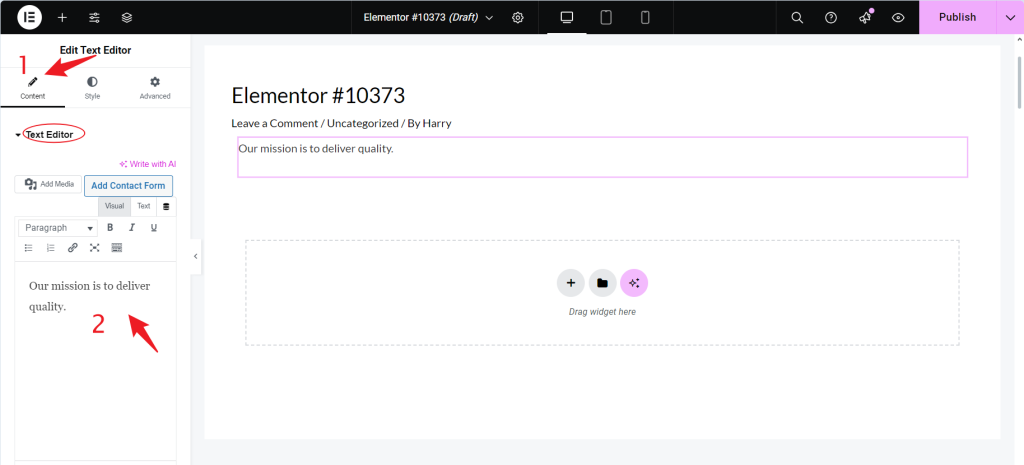
- Line 1:
- Text: “Our mission is to deliver quality.”
- Add a Text Editor widget in Elementor.
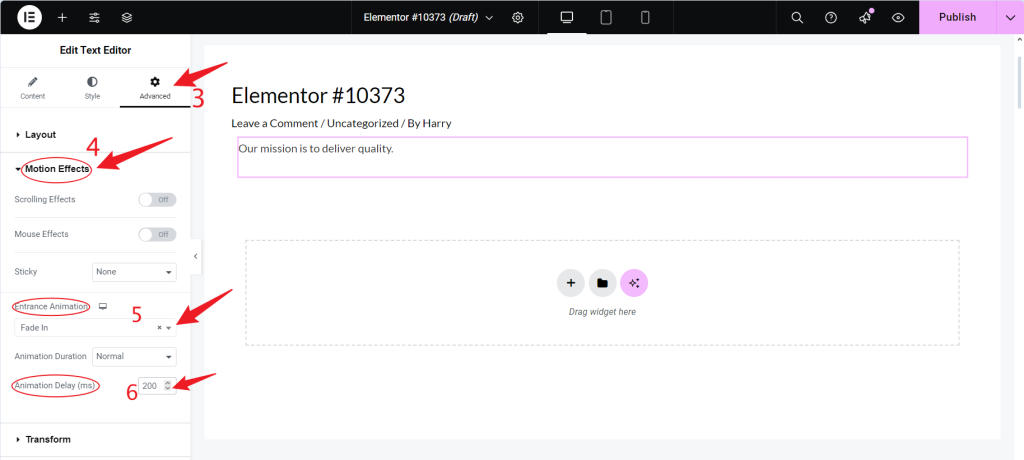
- Enter this sentence as the text.
- Apply the Fade In animation and set the delay to 0.2 seconds.
- Line 2:
- Text: “We prioritize customer satisfaction.”
- Add another Text Editor widget.
- Enter this sentence as the text.
- Apply the Fade In animation and set the delay to 0.4 seconds.
- Line 3:
- Text: “Together, we innovate for the future.”
- Add another Text Editor widget.
- Enter this sentence as the text.
- Apply the Fade In animation and set the delay to 0.6 seconds.
Each sentence will fade sequentially as the user scrolls or when the animation is triggered, creating a smooth transition effect.
This method ensures that each line of text appears individually, with a slight delay between each line, to enhance readability and create a dynamic visual effect.
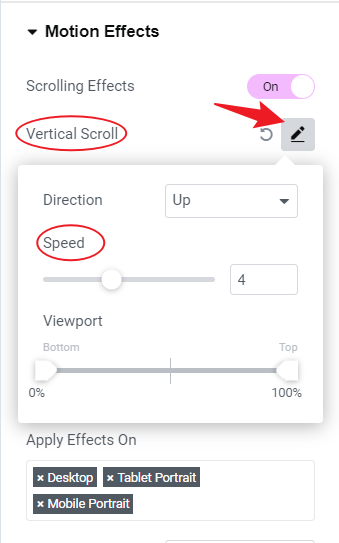
Advanced Fade-In Effects with Elementor Pro
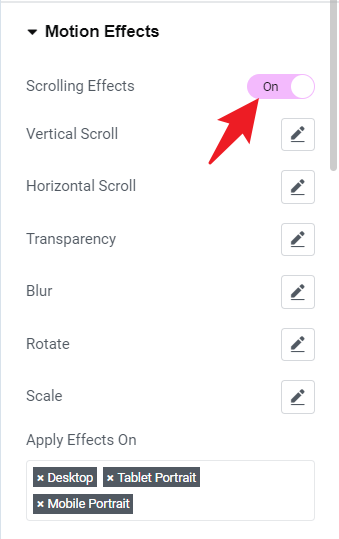
Elementor Pro provides more control, including scroll-triggered effects for a dynamic experience.
- Enable Scroll Effects: In the Motion Effects section, turn on Scroll Effects to trigger animations as the user scrolls.
- Add Transparency: In the scroll settings, select Fade In under transparency so the text gradually appears while scrolling.
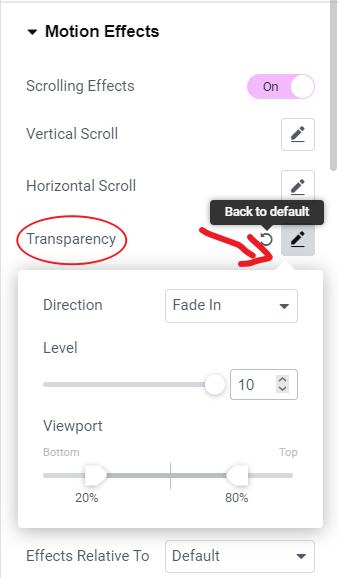
- Adjust Speed and Direction: Fine-tune the speed and direction to match scrolling behaviour, enhancing interactivity.
Preview and Publish
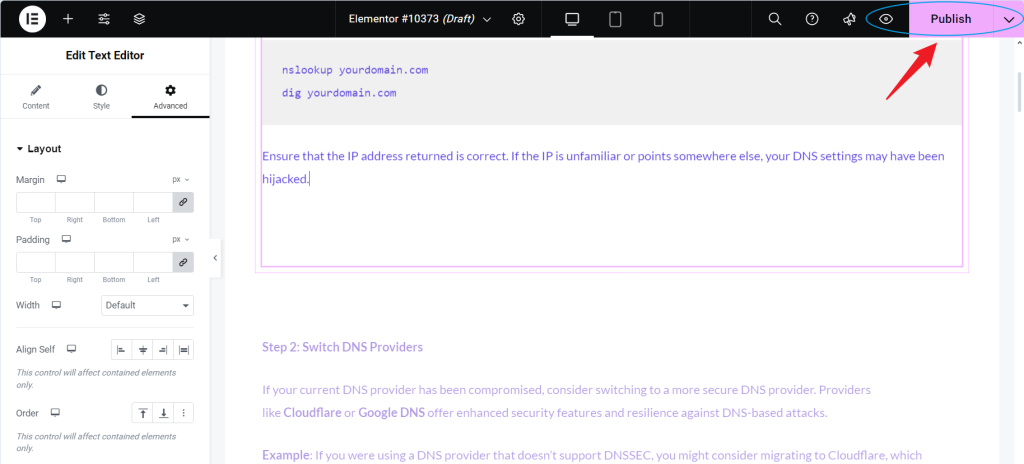
After setting up the animations, preview the page to ensure everything works as expected:
- Click the Preview button at the bottom left of the Elementor editor.
- Scroll through the page to confirm that each line fades in sequentially.
- If the effect is correct, click Publish to make the page live.
Conclusion
In conclusion, creating line-by-line fade-in text animations with Elementor is a great way to enhance user engagement by presenting content in a clear and visually appealing manner. By carefully timing the animations and adding delays, you can ensure that users absorb the information at a comfortable pace, preventing information overload. For those who want more control, Elementor Pro offers additional features like scroll-triggered animations and other customization options. After setting everything up, preview the results and publish your page to create a smooth, interactive experience for your visitors.


Responses