
行距或行高在網頁設計中至關重要,尤其是對於文字較多的網站。雖然看起來是個小細節,但適當的行距可大幅提升內容的可讀性,並改善整體使用者體驗。本指南將解釋為什麼行距是必要的,並教您在 WordPress 中調整行距的各種方法,並提供範例以確保您獲得最佳效果。

為何行距如此重要?
Line spacing directly affects the visual presentation of your website’s text and, in turn, your users’ experience. Here are a few reasons why it’s essential:
- 提高可讀性:如果您的文字間距過小,讀者就需要協助才能跟上,導致眼睛疲勞和沮喪。另一方面,過大的間距會讓使用者更容易維持專注力。適當的平衡可以改善內容的流動性,使其更容易閱讀和吸收。
- 更好的美感:間距合理的網站看起來更乾淨、更專業。例如,相較於雜亂無章、難以閱讀的文字區塊,行與行之間有適當間距的部落格會讓人覺得更吸引人、更有條理。
- 影響使用者參與度: User engagement is often linked to readability. If visitors find your content difficult to follow, they are likely to bounce off your site quickly. Proper line spacing increases users’ chances of staying longer, consuming more of your content, and interacting with your website.
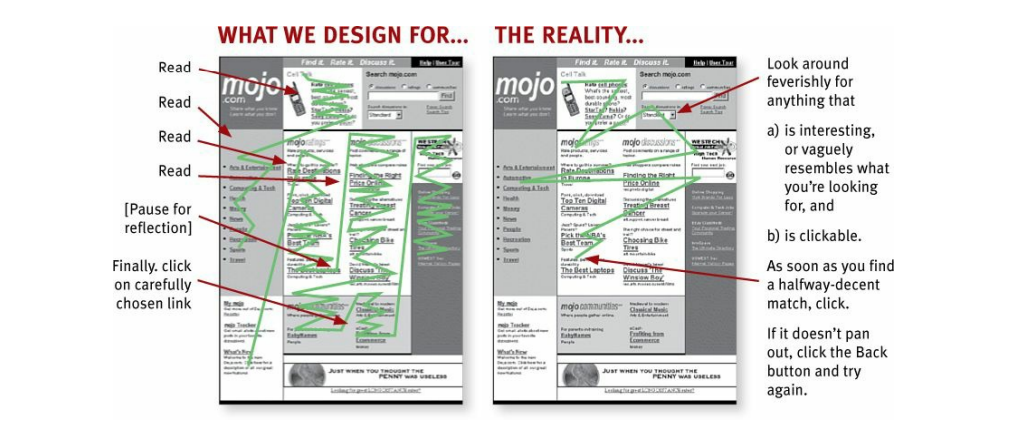
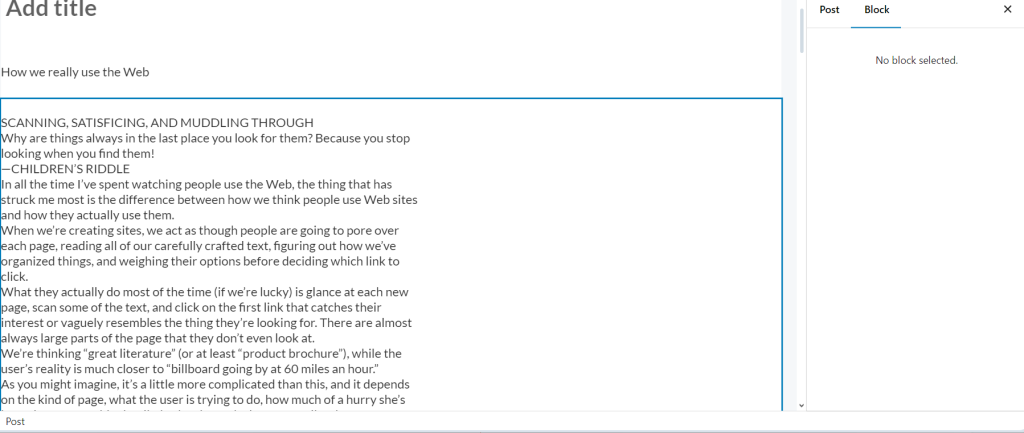
Example: In an ideal world, users read content carefully, reflecting before clicking links. In reality, they skim for something clickable, often hitting the back button if it’s not what they want. Clear, well-spaced content helps users find what they need, while cluttered text leads to frustration and higher bounce rates.

Suppose you want to learn more about optimizing your website’s user experience through line spacing. In that case, it is recommended that you read some materials on web readability and user experience design, such as Don’t Make Me Think這本書提供了許多有用的設計技巧。
如何在 WordPress 中調整行距
根據您的需求和偏好,WordPress 提供了幾種調整行距的方法,從內建編輯器到自訂編碼和外掛程式。以下是最常見的幾種方法,每種方法都有範例引導您。
1、調整 Gutenberg 編輯器的行距

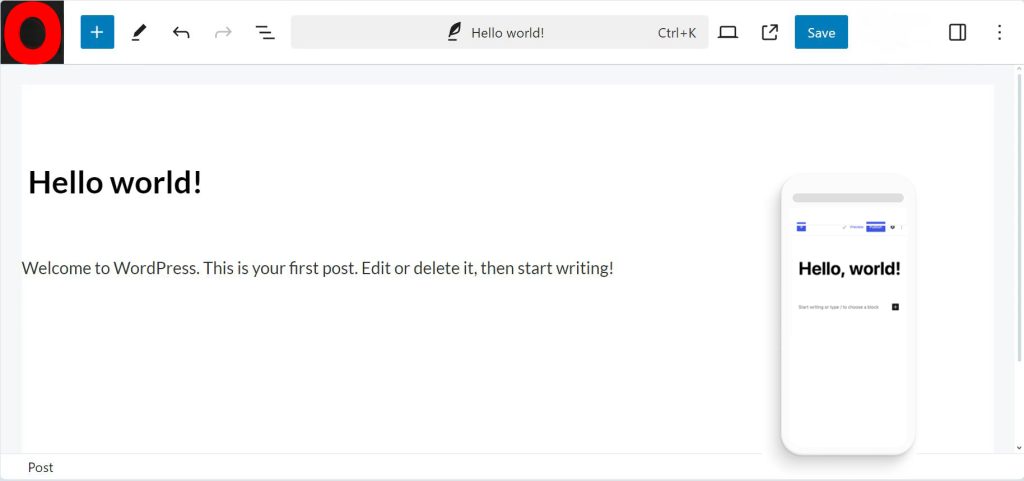
WordPress’s default block editor, Gutenberg, provides some essential control over line spacing. If you’re using the Gutenberg editor, follow these steps to adjust line-height:
步驟:
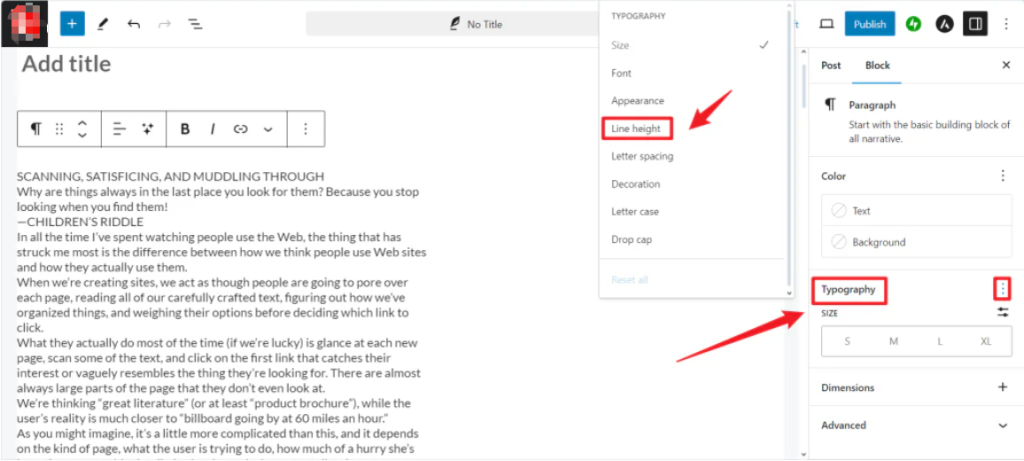
- 選取段落:開啟要編輯的 WordPress 頁面或文章,然後按一下需要調整間距的段落塊。

- 尋找排版設定: In the right-hand settings panel, locate the “排版” section.
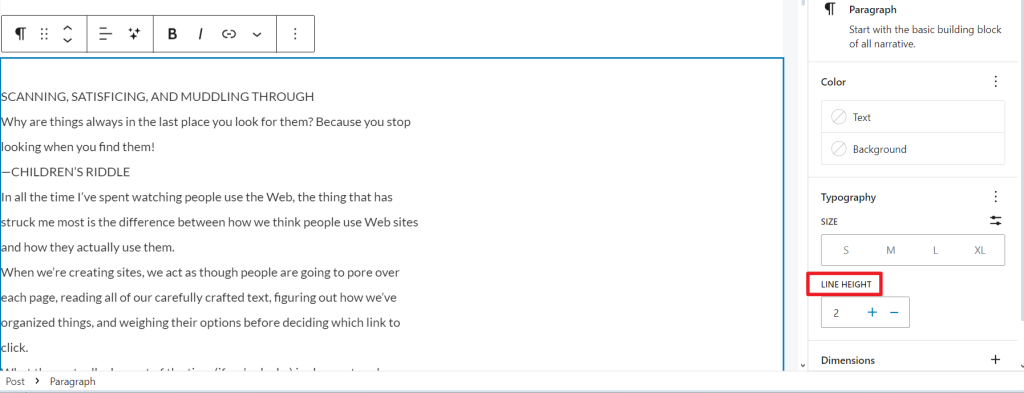
- 調整線高度: Under the typography settings, you will find an option for “Line Height.” You can increase or decrease the spacing by adjusting the numeric value or entering a custom number.

範例:假設您有一組文字的行距太密,以致難以閱讀。如果預設的行高是 1.4,將它增加到 1.8 或 2.0 將提供行與行之間更多的空間,改善可讀性。

這是調整個別段落或文字區塊行距的簡易方法。但是、 自訂 CSS 如果您需要更精確的控制,或需要在整個網站範圍內調整間距,則使用此選項可能會更有效。
2、在 Gutenberg 中使用自訂 HTML 調整行距
您可以新增自訂的 內嵌 CSS 在 Gutenberg 中可以更精確地控制個別段落或元素。
步驟:
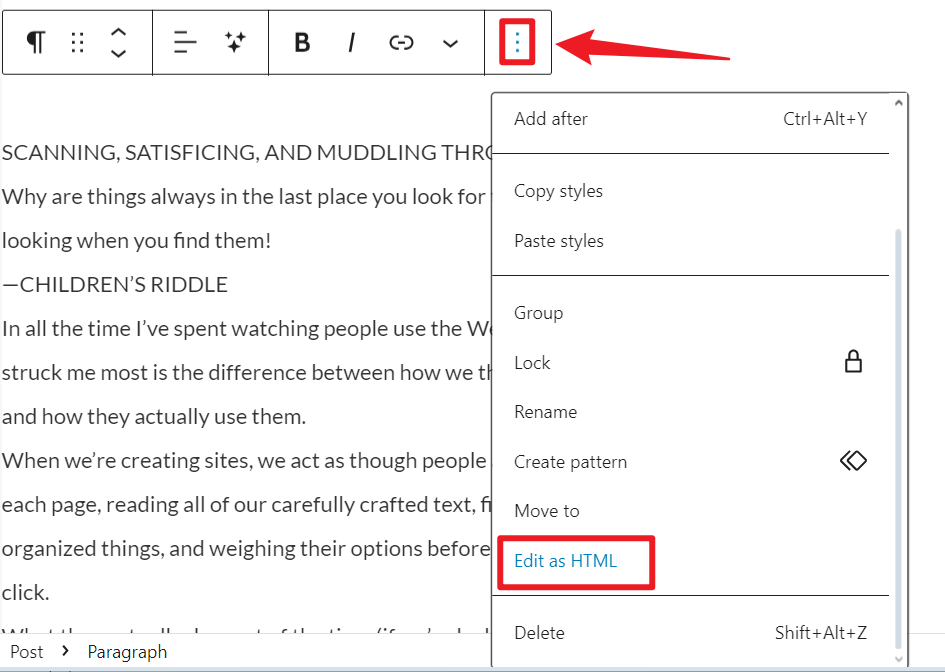
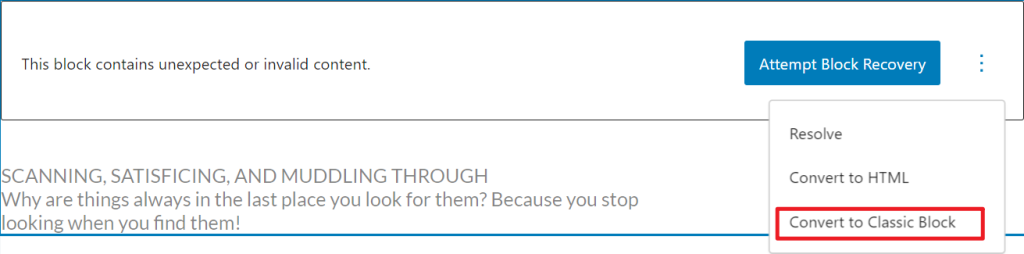
- 切換至代碼模式: Select the block you want to edit and click on the three-dot menu in the block toolbar. Select “編輯為 HTML” to switch to code view.

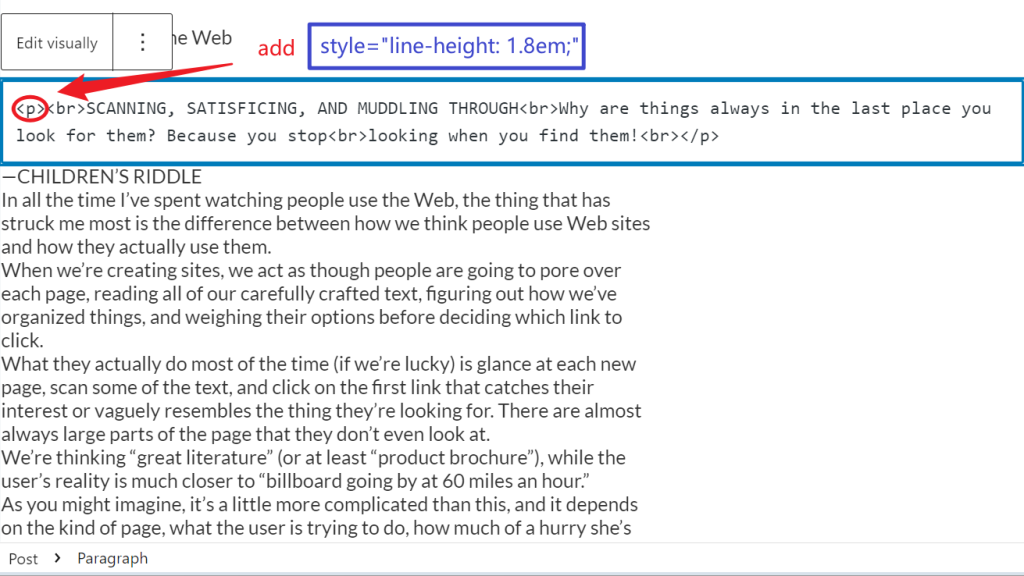
- 新增行高代碼:修改
<mark class="has-inline-color has-light-green-cyan-color amp-wp-cefb454" data-amp-original-style="background-color:rgba(0, 0, 0, 0)"><p></mark>標籤 (或您使用的任何 HTML 標籤) 加入 line-height 屬性。例如
<p style="line-height: 1.8em;">這是增加行距的段落。</p>範例: Let’s say your website uses a formal tone, and you want each paragraph in an article to have a slightly wider spacing for readability. Using the above method, you can set the line spacing for individual paragraphs to 1.8 em, which makes it easier for users to digest long pieces of text.

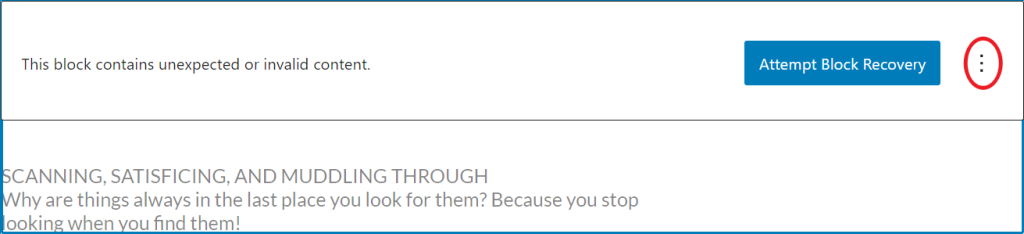
此區塊包含意外或無效的內容。選擇「轉換為經典區塊」。


此方法具有彈性,可讓您微調特定文字區塊或元素的行高。
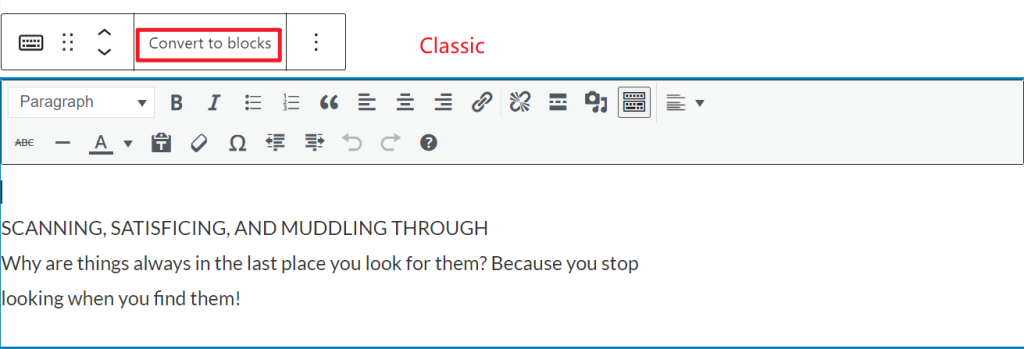
3、在經典編輯器中調整行距
If you’re still using the Classic Editor, WordPress allows you to adjust line spacing in both the visual editor and HTML code.
- 使用格式下拉式:
- 反白您要變更的段落。
- In the toolbar, look for a dropdown menu labelled “Format.” Depending on your theme, there may be preset line heights like 1.5, 2.0, etc.
範例:如果您的主題允許,您可以設定整個正文的行高統一為 1.6 或 1.8。這對部落格或長篇內容很有用,可確保每篇文章都有一致的間距。
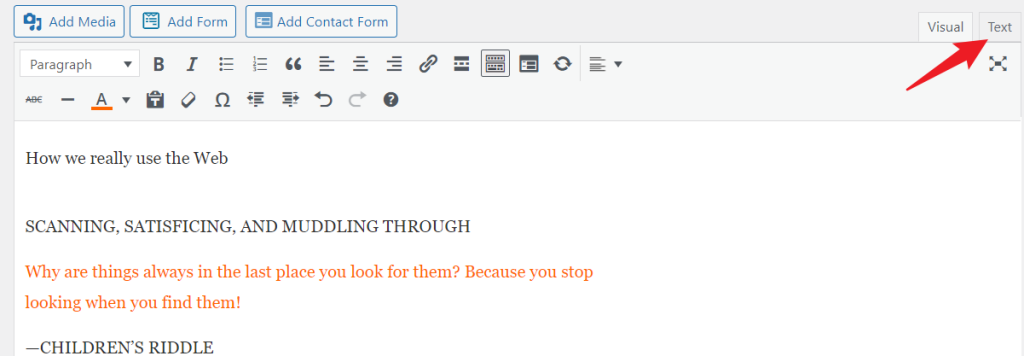
- 使用文字編輯器 (HTML 檢視):
- 按一下" "。正文” tab in the Classic Editor to switch to HTML view.
- 直接在段落的 HTML 中加入內嵌 CSS:
<p style=" line-height: 1.7;">此段的行高為 1.7。</p>
範例:對於那些希望對有長段落或小點的部分有更多控制的人,使用 HTML 手動設定行距可以自訂頁面的特定部分,而不碰觸其他元素。
4、通過主題自訂器調整行距
許多 WordPress 主題直接透過主題自訂器提供行距控制。這種方法非常適合在整個網站中使用一致的行距,而無需修改個別文章或頁面。
步驟:
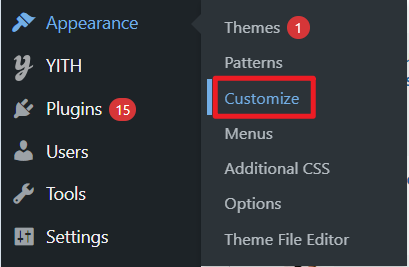
- 開啟主題自訂器:從 WordPress 面板,導覽到 外觀 > 自訂.

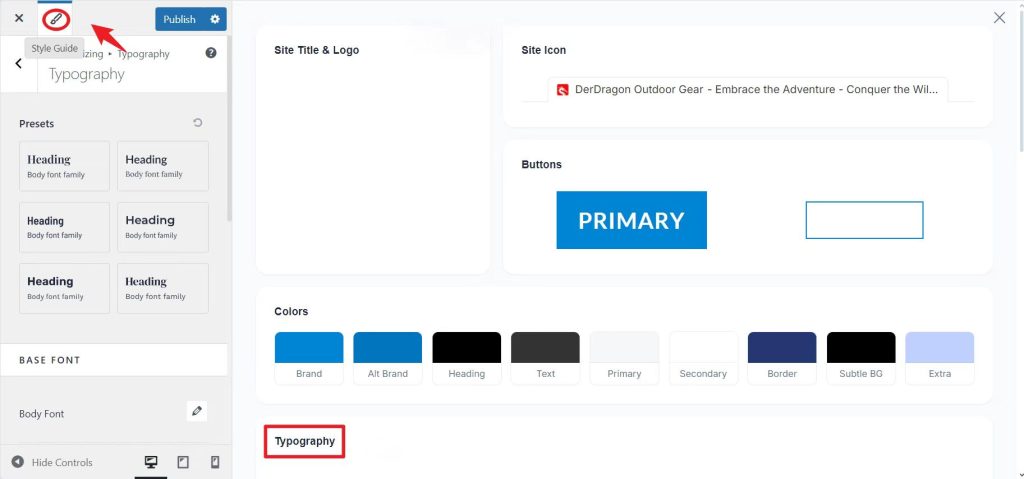
- 尋找排版設定: Depending on your theme, a section will be labelled “排版「 或 」全球風格.” In this section, look for an option to adjust the line height.


- 全域調整線高度:有些主題提供滑桿或輸入方塊,您可以在其中設定各種文字元素的行高,例如正文、標題,甚至是方塊引號。
範例: Let’s say you use a theme like Astra or GeneratePress, which offers detailed typography controls. Set the global line height for body text to 1.6 and increase the line height for headings to 1.2. This would give your site a balanced, readable layout with tighter heading spacing and more relaxed body text spacing.


Alternatively, if your theme does not provide these controls, you can use the “額外的 CSS” section to add global CSS rules, such as manually
p {

  line-height: 1.6;

}
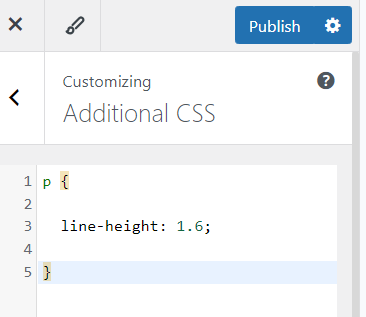
這可確保您網站上的每個段落都保持一致、可讀的行距。
5、使用 WordPress 外掛調整行距
如果您偏好更直觀的方法,並希望避免自訂編碼,WordPress 外掛程式可以協助您輕鬆管理行距和其他版面元素。
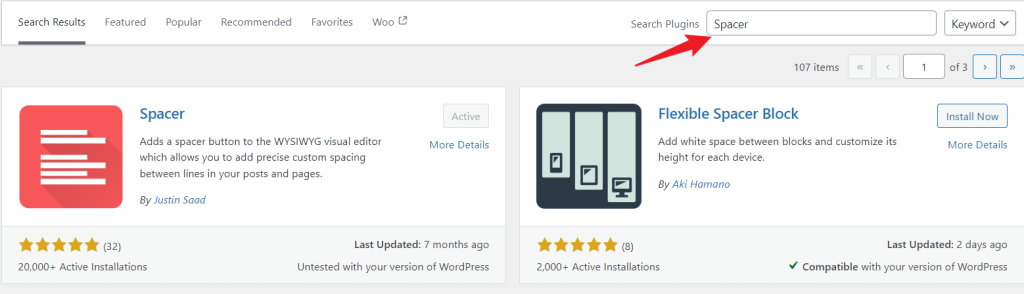
其中一個外掛程式是 墊片,可讓您透過加入空白區塊來控制元素之間的空間。
步驟:
- 安裝 Spacer 外掛程式:從儀表板,移至 外掛程式 > 新增 外掛程式, search for “墊片,” install, and activate it.

- 在 Gutenberg 中加入間隔塊: In the Gutenberg editor, click the “+” icon to add a block, search for “Spacer,” and drag it between paragraphs, images, or other elements.
- 調整墊片高度:添加 Spacer 區塊後,使用拖曳手柄調整其高度,或在區塊設定中輸入特定值。

範例: Suppose you’re designing a landing page and want more breathing room between sections like headlines, images, and text. Inserting Spacer blocks allows you to visually adjust the spacing without touching any code.
總結
在 WordPress 中調整行間距對於增強可讀性、美感和使用者參與度至關重要。適當的行距可確保您的文字易於閱讀且具有視覺吸引力。WordPress 提供多種調整行距的方法,包括使用 Gutenberg 編輯器、自訂 HTML、經典編輯器、主題自訂器,以及 Spacer 等外掛程式。每種技術都能根據您的需求提供彈性,從微調單獨的文字區塊到應用整個網站的調整。透過優化行距,您可以為網站訪客創造更愉快、更吸引人的閱讀體驗。