Elementor and JavaScript: Advanced Dynamic Website Development
Elementor is a famous page builder for WordPress, but by combining it with JavaScript, you can break through its basic functionality to create even more advanced interactivity and visual effects. This guide’ll explore combining Elementor with JavaScript to elevate your website development skills and create a dynamic, interactive user experience. This guide is aimed at developers with knowledge, including complex code examples and advanced techniques.
Getting Started
- Elementor Pro: The Pro version of Elementor offers more flexible features and customization options, which are perfect for advanced development.
- JavaScript Basics: We’ll use vanilla JavaScript and some popular libraries to implement animations and interactive features.
- WordPress Setup: You should have a well-functioning WordPress site with Elementor Pro installed.
Let’s get started!
Step 1: Integrating JavaScript with Elementor Pages
Elementor doesn’t have a direct ‘Custom Code’ option to add JavaScript, but there are a few effective ways to do so.
- Using the WPCode Plugin:
- Install the WPCode Plugin: You can use the WPCode plugin to add custom JavaScript without modifying the theme’s
functions.phpfile.- Navigate to Plugins > Add New in the WordPress dashboard.
- Search for WPCode and click Install Now, then Activate.
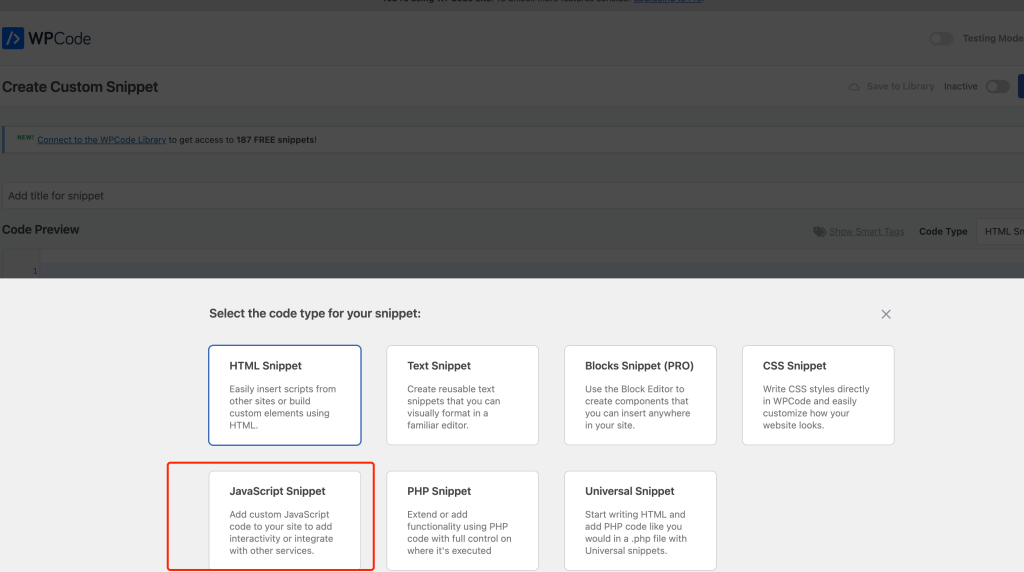
- Add JavaScript Using WPCode:
- Go to Code Snippets > Add Snippet in the WordPress dashboard.
- Click on Add Your Custom Code (New Snippet) and select JavaScript as the code type.
- Name Your Snippet: Give your snippet a name that helps identify its purpose (e.g., “Page Load Animation Script”).
- Insert JavaScript Code: Paste your JavaScript code into the snippet editor.
- Choose Placement: Decide whether to load the script in the Header or Footer. Generally, it’s recommended to load scripts in the Footer to ensure that all elements are already loaded.
- Loading JavaScript in the footer ensures that the entire HTML document is parsed and available, reducing the chances of encountering errors due to trying to interact with elements that are not yet present on the page.
- Set Insertion Rules: Specify where the script should run (e.g., entire site or specific pages).
- Wrap JavaScript in
DOMContentLoaded: Ensure the code runs after the page has loaded to prevent errors.- This ensures that all page elements are available, preventing errors caused by attempting to manipulate elements that haven’t loaded.
- Install the WPCode Plugin: You can use the WPCode plugin to add custom JavaScript without modifying the theme’s
document.addEventListener("DOMContentLoaded", function() {
console.log("JavaScript is running after the page has loaded");
});
This simple script confirms that your JavaScript is running properly after loading the page.
Using the HTML Widget in Elementor:
- Drag and Drop the HTML Widget: Another way to add JavaScript is by using Elementor’s HTML widget.
- Edit the page with Elementor and drag the HTML widget to the desired location.
- Inside the widget, add your JavaScript code wrapped in
<script>tags.
- Inline JavaScript: This method is useful for adding JavaScript that applies to a specific element or part of the page.
Example:
<script>
  document.addEventListener("DOMContentLoaded", function() {
    console.log("Inline JavaScript via HTML widget");
  });
</script>
This method is useful when you want JavaScript to run only on a particular section of the page, giving you more control over the functionality.
Step 2: Adding Dynamic Interactivity with JavaScript
After integrating JavaScript, we can start adding some dynamic effects, such as button clicks and hover effects.
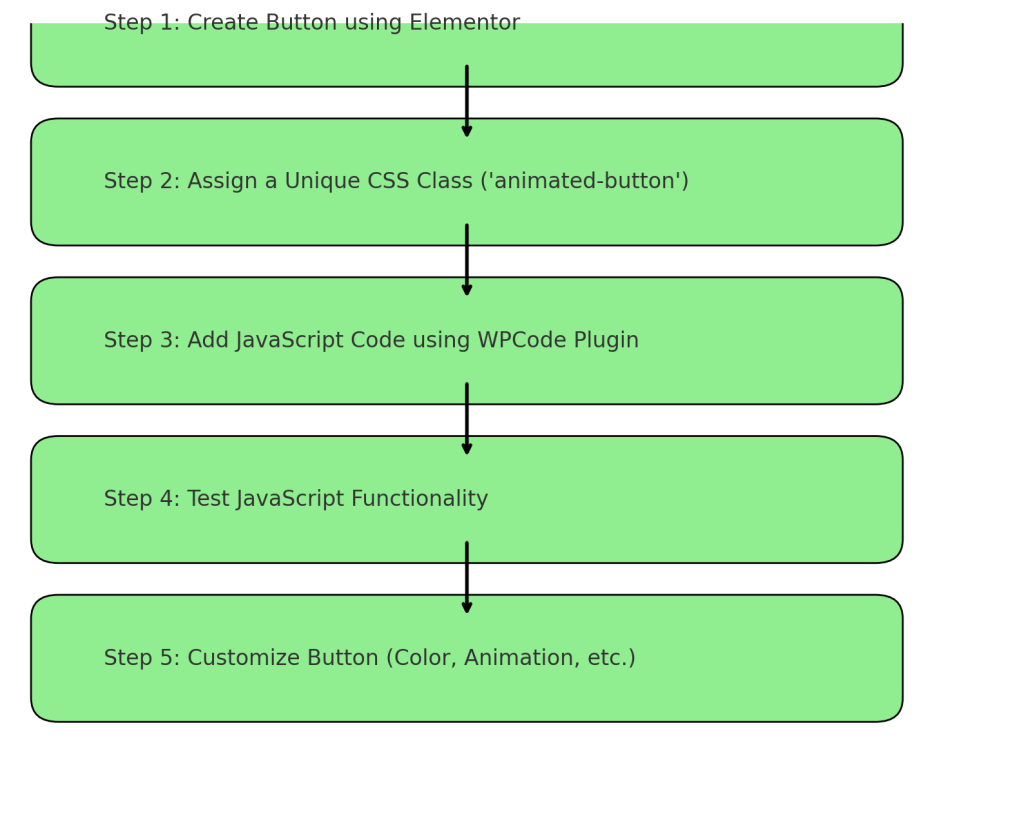
- Adding a Button Click Animation:
- Create an Interactive Button: Add a button element using Elementor, and give it a class for targeting (e.g.,
animated-button). - Add JavaScript to Handle Click Events: Use JavaScript to implement a simple click animation, such as resizing the button or changing its color.
- Create an Interactive Button: Add a button element using Elementor, and give it a class for targeting (e.g.,
document.addEventListener("DOMContentLoaded", function() {
  const button = document.querySelector(".animated-button");
  if (button) {
    button.addEventListener("click", function() {
      button.style.transform = "scale(1.2)";
      button.style.backgroundColor = "#ff6347"; // Change color to tomato
      setTimeout(() => {
        button.style.transform = "scale(1)";
        button.style.backgroundColor = ""; // Revert color
      }, 300);
    });
  }
});- This code will enlarge the button and change its color when clicked, then revert it to its original size and color after a short delay.
Detailed Example: Suppose you add a button with the class animated button on your Elementor page. With the above code, clicking the button will create a brief enlarging and color-changing effect, making it more visually engaging for users.
Adding a Hover Effect to an Image Grid:
- Create an Image Grid: Use Elementor to create an image grid and assign a class name to each image (e.g., image-grid-item).
- Add JavaScript to Handle Hover Events: Use JavaScript to add hover effects, such as fading in and out, to enhance user experience.
Example:
document.addEventListener("DOMContentLoaded", function() {
  document.querySelectorAll(".image-grid-item").forEach(item => {
    item.addEventListener("mouseenter", () => {
      item.style.opacity = "0.7";
      item.style.transition = "opacity 0.3s ease-in-out";
    });
    item.addEventListener("mouseleave", () => {
      item.style.opacity = "1";
    });
  });
});- This code changes the opacity of each image element when the mouse hovers over it, making the user experience more engaging.
Detailed Example: Add an image grid in Elementor and assign the class image-grid-item to each image. With this code, users will see a subtle fading effect when hovering over images, adding a layer of sophistication to the site.
Step 3: Enhancing Visual Effects with JavaScript Animation Libraries
JavaScript animation libraries like GSAP can help you create complex and smooth animations.
- Integrate GSAP Animation Library:
- Load GSAP: Load the GSAP library using WPCode or the HTML widget.
<script src="https://cdnjs.cloudflare.com/ajax/libs/gsap/3.11.4/gsap.min.js"></script>Animating Elementor Elements with GSAP:
- Add GSAP Animation: Use GSAP to add animations to Elementor elements, such as fading in an image grid when the page loads.
Example:
document.addEventListener("DOMContentLoaded", function() {
  gsap.from(".image-grid-item", {
    duration: 1,
    opacity: 0,
    y: 50,
    stagger: 0.2,
    ease: "power2.out"
  });
});- This code will make each image element fade in sequentially from the bottom as the page loads, creating a smooth and professional-looking transition.
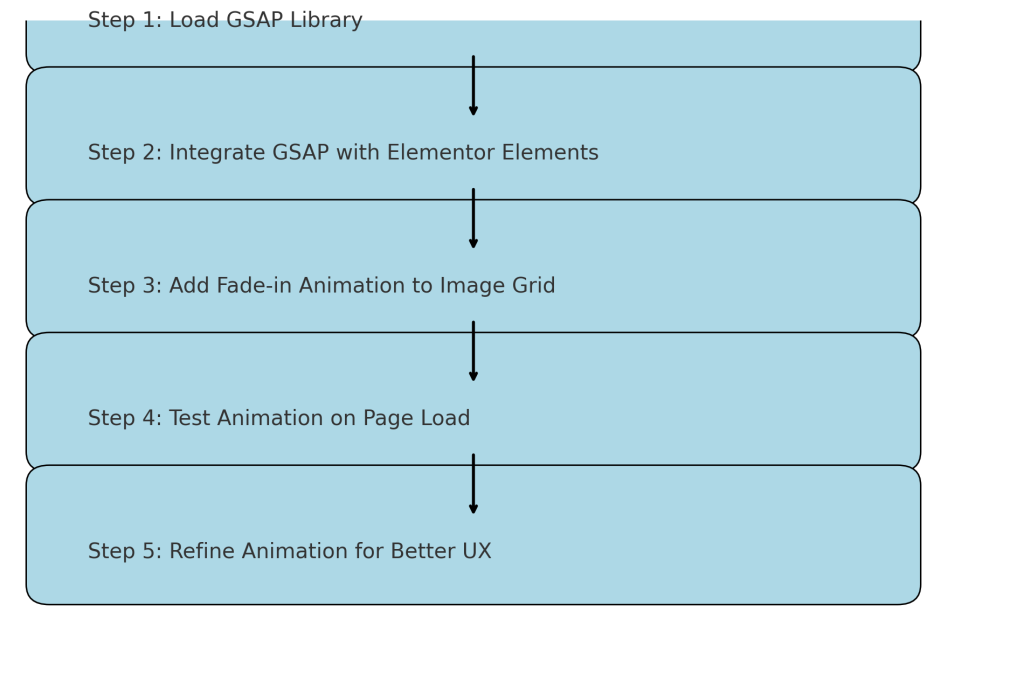
Detailed Example: Create a grid with several images using Elementor, and assign the class image-grid-item. When the page loads, each image will smoothly fade in from below, one after another, which can be highly effective in creating a visually appealing experience for visitors.
Step 4: Adding Scroll-Based Animations with ScrollTrigger
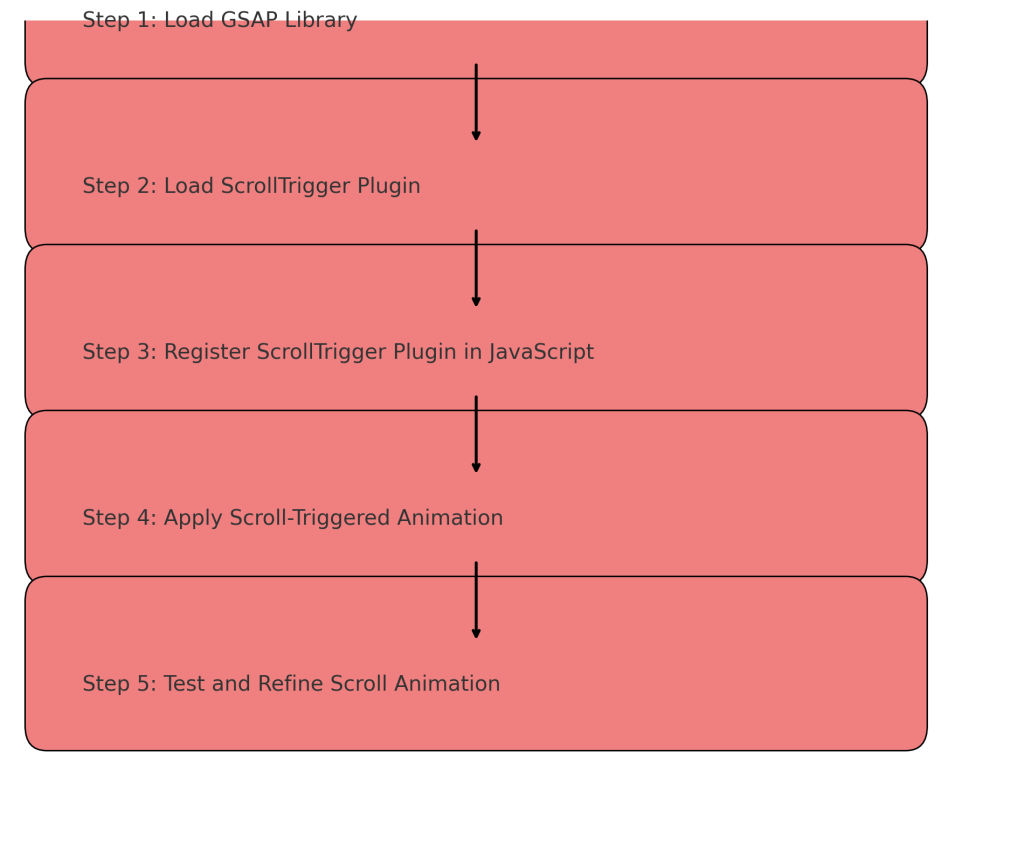
ScrollTrigger is a GSAP plugin that allows you to trigger animations based on user scroll actions—ideal for creating dynamic scrolling effects.
ScrollTrigger is a GSAP plugin that allows you to trigger animations based on user scroll actions—ideal for creating dynamic scrolling effects.
- Load the ScrollTrigger Plugin:
- Add ScrollTrigger: After loading GSAP, integrate ScrollTrigger as follows:
<script src="https://cdnjs.cloudflare.com/ajax/libs/gsap/3.11.4/ScrollTrigger.min.js"></script>2. Create Scroll-Triggered Animations:
Add Scroll Effects: Create animations that trigger as users scroll to specific sections of your page.
document.addEventListener("DOMContentLoaded", function() {
  gsap.registerPlugin(ScrollTrigger);
  gsap.from(".section-title", {
    scrollTrigger: {
      trigger: ".section-title",
      start: "top 80%", // Animation starts when the section title is in view
      end: "top 30%",
      scrub: true
    },
    duration: 1.5,
    opacity: 0,
    y: -50,
    ease: "power3.out"
  });
});- When users scroll to the .section-title element, it will slide in from above, creating a dynamic visual effect that adds life to your page.
Detailed Example: Suppose you have a page or section title with the class section-title. The above code will cause the title to slide in from the top as the user scrolls, providing a smoother and more engaging scroll experience. You can customize the start and end triggers to control when the animation begins and ends.
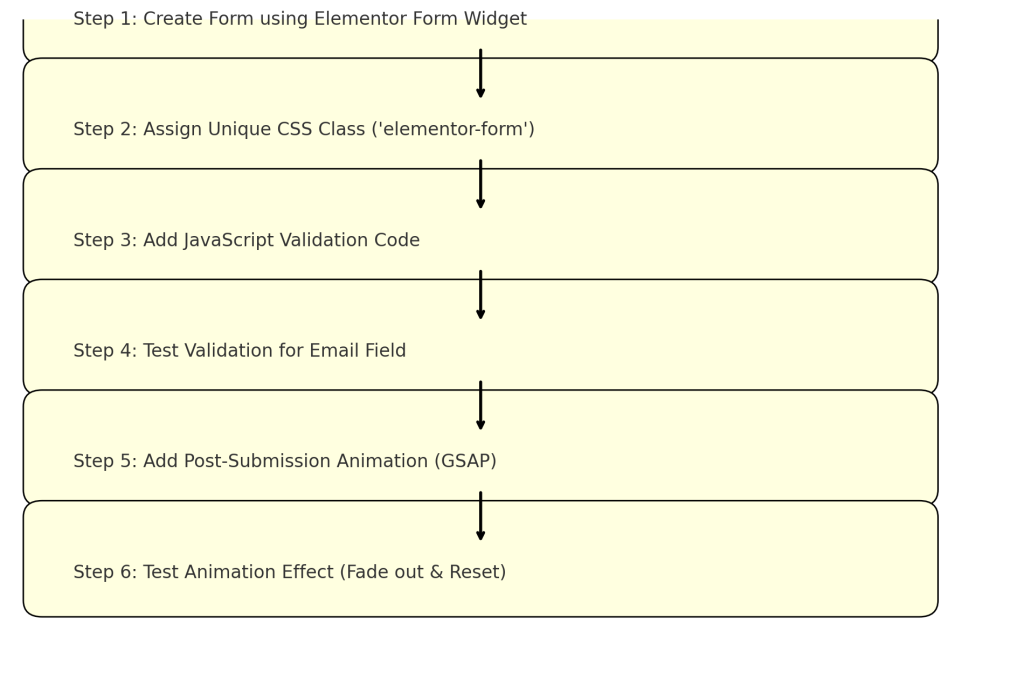
Step 5: Enhancing Elementor Forms with Custom JavaScript
Elementor’s form widget is very useful, but we can add more functionality with JavaScript, such as form validation or post-submission animations.
- Form Validation Example:
- Add Validation to Form Fields: Use JavaScript to add simple validation to an Elementor form.
document.addEventListener("DOMContentLoaded", function() {
  gsap.registerPlugin(ScrollTrigger);
  gsap.from(".section-title", {
    scrollTrigger: {
      trigger: ".section-title",
      start: "top 80%", // Animation starts when the section title is in view
      end: "top 30%",
      scrub: true
    },
    duration: 1.5,
    opacity: 0,
    y: -50,
    ease: "power3.out"
  });
});
Detailed Example: If you’ve created a subscription form in Elementor and assigned the class elementor-form, the above code ensures that users enter a valid email address before submitting the form, reducing invalid entries and ensuring higher-quality data.
2. Post-Submission Animation Feedback:
- Add Visual Feedback After Submission: Add an animation effect after a successful form submission to improve user experience.
Example:
document.addEventListener("DOMContentLoaded", function() {
  const form = document.querySelector(".elementor-form");
  if (form) {
    form.addEventListener("submit", function(event) {
      event.preventDefault(); // Prevent default submission to simulate feedback
      gsap.to(form, {
        duration: 0.5,
        opacity: 0,
        onComplete: function() {
          form.reset();
          gsap.to(form, { duration: 0.5, opacity: 1 });
        }
      });
    });
  }
});- This code gradually hides the form after submission, resets it, and then fades it back in, providing a visual cue to users.
elementor-form, and with the above code, users will see the form fade out after submission and then reappear, providing a smooth and visually engaging confirmation of the form reset.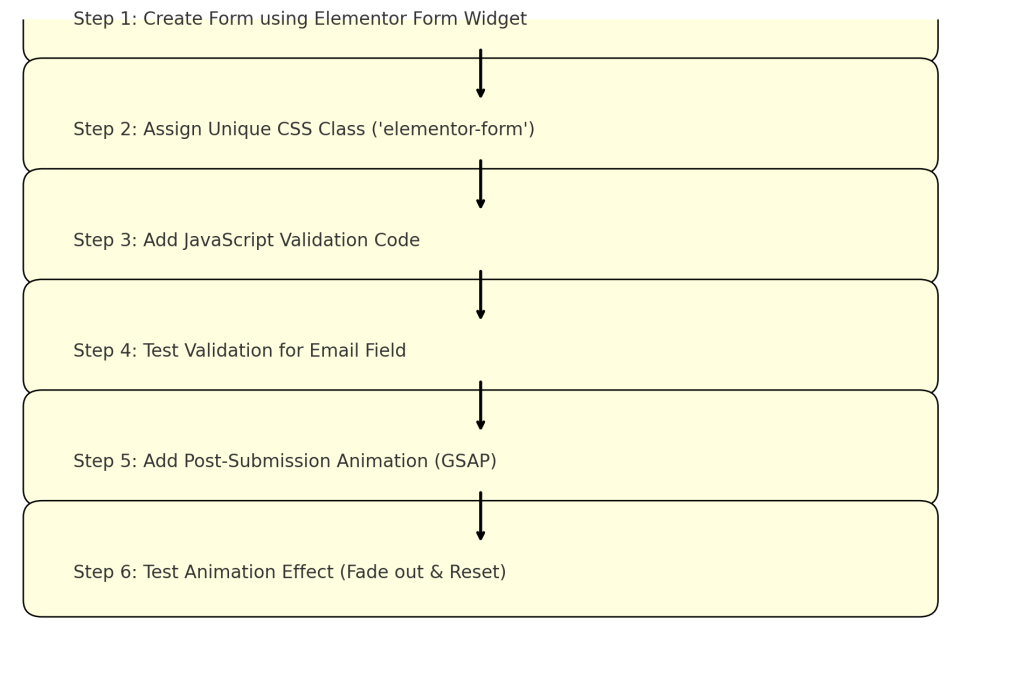
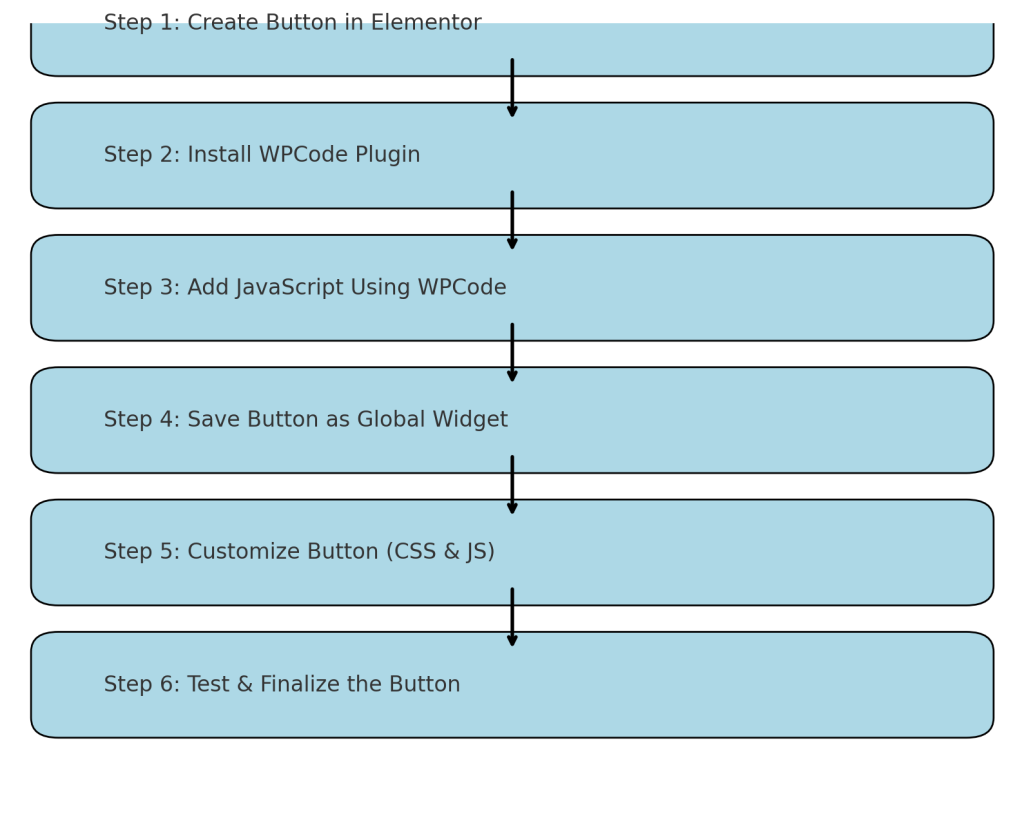
Integrating These Features into Elementor as a Permanent Button
To make these JavaScript features accessible directly within Elementor and create a reusable button with these integrated functionalities, follow these steps:
- Create a Button with the Elementor Button Widget:
- Use Elementor to create a button element on the page by dragging the Button Widget onto your page.
- Customize the button text, size, style, and other properties as desired.
- In the Advanced tab, assign a unique CSS class to the button (e.g.,
integrated-action-button). This CSS class will be used to identify the button in JavaScript.
- Add JavaScript Code to Handle Button Functionality:
- To make the button interactive, we need to add JavaScript code that listens to button events like click or hover.
- Use the WPCode Plugin to add your JavaScript globally across the website:
- Install and activate the WPCode Plugin from the WordPress plugin directory.
- Navigate to Code Snippets > Add Snippet.
- Choose JavaScript as the code type and add the JavaScript code to handle the button’s interaction.
- Make sure to specify that the code should run on Frontend and select the location to run the script (preferably in the Footer to ensure all elements have loaded).
Example Code:
document.addEventListener("DOMContentLoaded", function() {
  const button = document.querySelector(".integrated-action-button");
  if (button) {
    button.addEventListener("click", function() {
      // Example: Trigger an animation effect on the button when clicked
      gsap.to(button, { duration: 0.5, scale: 1.2, ease: "power2.out" });
      setTimeout(() => {
        gsap.to(button, { duration: 0.5, scale: 1 });
      }, 500);
    });
  }
});
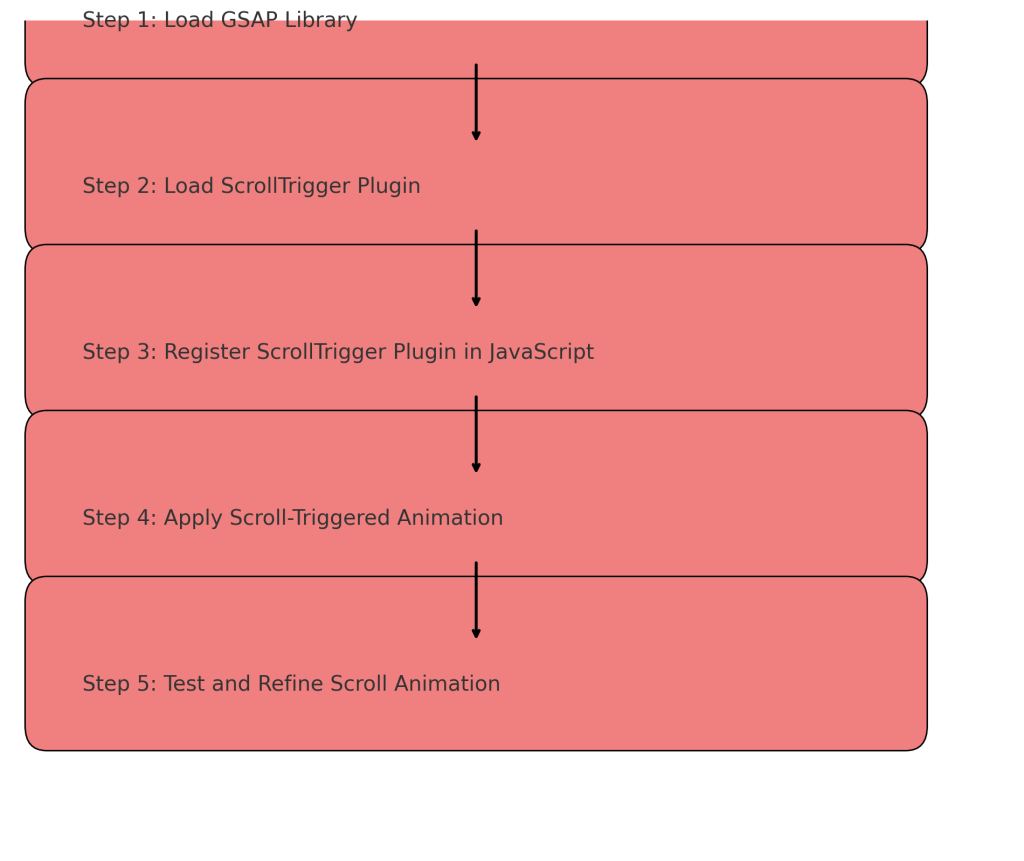
This code listens for a click event on the button and triggers an animation using GSAP. The button scales up to 1.2x its size and then returns to its original size, creating a visual effect for the user.
- Save the Button as a Global Widget:
- After setting up the button and testing that the JavaScript functionality works, you can save the button as a Global Widget in Elementor.
- To do this, right-click on the button widget and select Save as Global. Give the global widget a descriptive name (e.g., “Interactive Button with GSAP Animation”).
- By saving it as a global widget, you can reuse this button across different pages without having to reconfigure the settings or JavaScript code each time.
- Testing and Customizing the Button:
- Test the Button: Ensure that the button behaves as expected across different pages where it’s used. Make sure that clicking the button triggers the JavaScript actions correctly.
- Customize the Functionality: You can further enhance the functionality of the button by adding more JavaScript features, such as custom animations, API calls, or interactions with other page elements.
- Make the Button Permanent with Custom Styling and Behavior:
- You can style the button using additional custom CSS. Use Elementor’s Custom CSS section or the WordPress Additional CSS section to apply unique styles to the button.
Example of custom CSS:
.integrated-action-button {
  background-color: #ff6347;
  color: #fff;
  border-radius: 5px;
  padding: 15px 30px;
  transition: background-color 0.3s ease;
}
.integrated-action-button:hover {
  background-color: #e5533d;
}- This CSS snippet gives the button a custom color and rounded edges, and it changes the color on hover to provide visual feedback.
- Integrate Additional JavaScript Functionalities:
- If you want to add more complex functionalities, such as submitting a form, toggling page elements, or calling external APIs, you can extend the JavaScript code accordingly.
- Example of adding a console log and toggling visibility of another element when the button is clicked:
document.addEventListener("DOMContentLoaded", function() {
  const button = document.querySelector(".integrated-action-button");
  const targetElement = document.querySelector(".target-element");
  if (button && targetElement) {
    button.addEventListener("click", function() {
      // Log message to console
      console.log("Button clicked, performing actions...");
      // Toggle visibility of the target element
      targetElement.style.display = targetElement.style.display === "none" ? "block" : "none";
    });
  }
});
By following these steps, you can create a button in Elementor with built-in JavaScript functionality that can be reused across your entire website, enhancing both the consistency and efficiency of your development workflow. This makes it easy to add advanced interactions and animations to Elementor pages without needing to manually configure each button individually.
Conclusion
By combining Elementor with JavaScript, you can create more advanced and dynamic interactions on your WordPress website. This advanced development approach greatly enhances your page design capabilities and helps your website stand out. Whether using vanilla JavaScript to control page elements or leveraging animation libraries like GSAP for smooth transitions, the combination of Elementor and JavaScript can provide an outstanding user experience.
With these detailed examples, you can start experimenting with more complex interactions and effects. I hope this guide sparks your creativity! If you have any questions or need further assistance, feel free to reach out.




Responses